Build a 400 series WW2 Fighter for less than $20
-
karolenaz
- Posts: 17
- Joined: Wed Jul 11, 2012 2:32 pm
Re: Build a 400 series WW2 Fighter for less than $20
Really nice building thread  GOOD LUCK!!!!!!!!!!
-
Wildpig
- Posts: 529
- Joined: Thu Jan 26, 2012 9:41 am
Re: Build a 400 series WW2 Fighter for less than $20
Your dad had an impressive career. The "Connie" is one of my all time favorite aircraft. An FE on one of those really had his work cut out. Actually rode in a 727, great airplane.
Now, I'm curious which boat he was on in WWII. Sorry about all the off topic stuff.
Now, I'm curious which boat he was on in WWII. Sorry about all the off topic stuff.
-
Mitch
- Posts: 1351
- Joined: Mon Aug 22, 2011 9:16 pm
- Location: Kent, WA
Re: Build a 400 series WW2 Fighter for less than $20
Yes indeedy... Just spoke with my Dad today and he is now following this post...
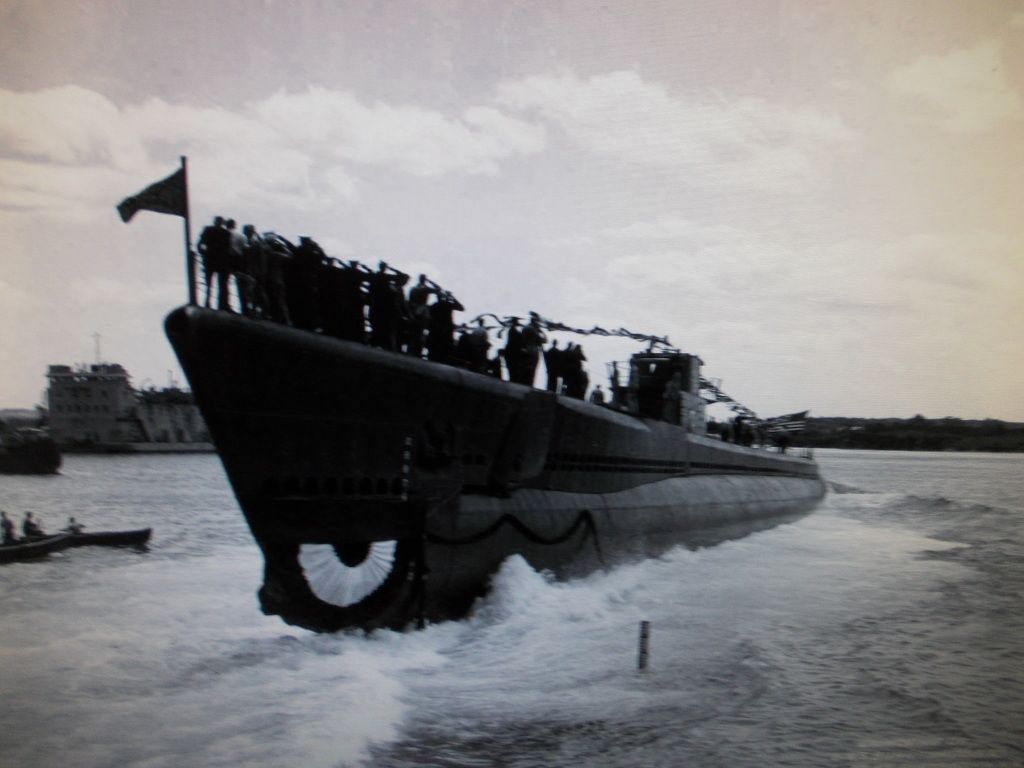
Anyway he said I was correct, the Connie was his favorite. He was in HS at the tender age of 16 on Dec 7th 1941, In Feb of '42 he turned 17. With parents permission, and after graduating from HS early, he joined the US Navy. He was assinged to the USS Burrfish SS 312. He was a Torpedoman. He stayed on that same Boat for his entire wartime service and made 4 War Patrols.
Back to the present...
Although there have been interuptions during the production day the wing is progressing nicely... The production schedule has been set for 1 week... ONLY 7 days! With engine problems in the FW 190, The Luftwaffe High Comand is rushing to production the next generation Bf109... The F model... Lighter, Redesigned Wing and Better Engine that just arrived from SIG Mfg. Co. This has all been necessary to go up against that Guillow's P-51 Mustang!
1. Review Plan and cut New Parts. DONE
2. Build Wing. IN PROGRESS, report to follow tonight!
3. Build Fuselage and Tail
4. Run stringers in fuselage
5. Fitting / Plastic Parts / Covering
6. Doping / Assembly / Finish
7. Field test Balancing and Flight Test
The Lead Engineer says the Plane will be ready! Mitch
-
Wildpig
- Posts: 529
- Joined: Thu Jan 26, 2012 9:41 am
Re: Build a 400 series WW2 Fighter for less than $20
That took a lot of Patriotism and courage to join into a war as a 17 year old kid. Tell him I said ,"thanks".
Here is a link to "his" boat:
http://www.navsource.org/archives/08/08312.htm
Back on topic:
Sehr gut, Herr Mitch. Vee vill see vhat you can accomplish.
(My knowledge of the German language comes from watching Hogan's Heroes and making a "D" in HS German class. Does it show?)
Here is a link to "his" boat:
http://www.navsource.org/archives/08/08312.htm
Back on topic:
Sehr gut, Herr Mitch. Vee vill see vhat you can accomplish.
(My knowledge of the German language comes from watching Hogan's Heroes and making a "D" in HS German class. Does it show?)
-
Mitch
- Posts: 1351
- Joined: Mon Aug 22, 2011 9:16 pm
- Location: Kent, WA
Re: Build a 400 series WW2 Fighter for less than $20
Okay Colonel Klink,
Here is the progress report for Day 2.
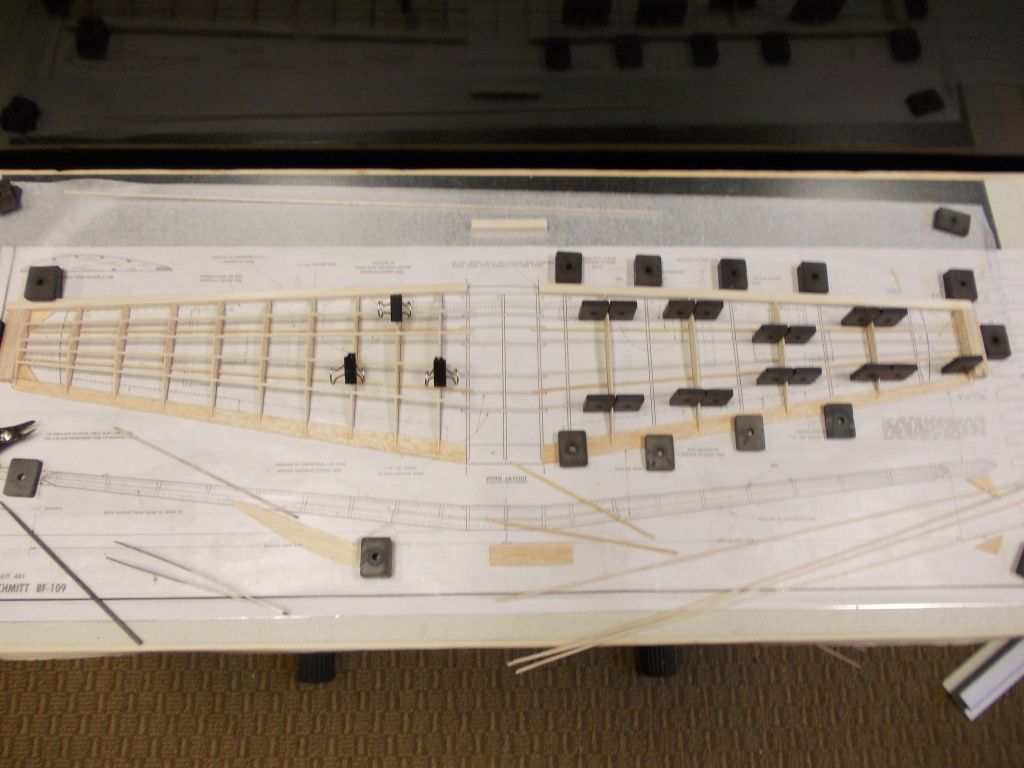
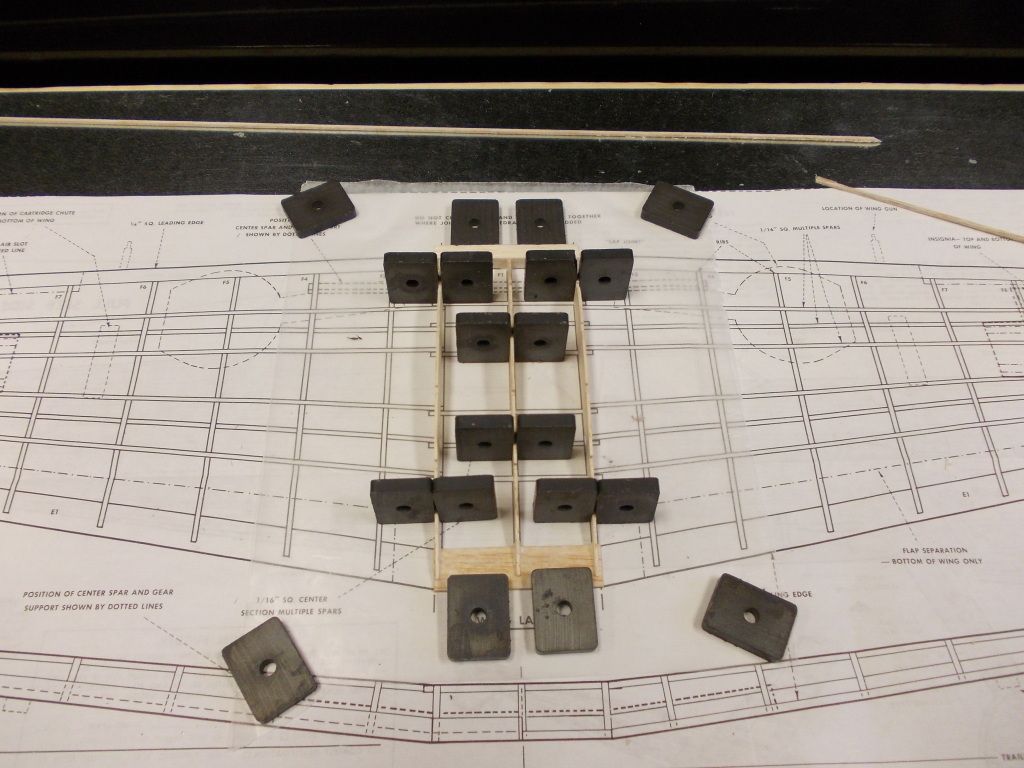
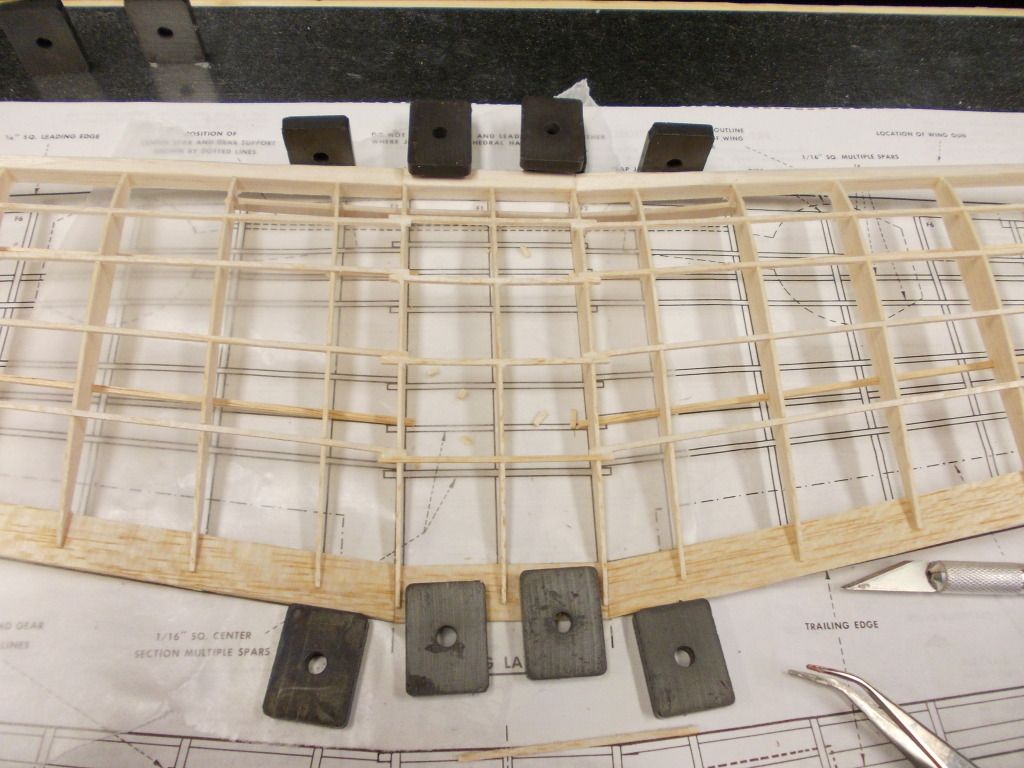
Wing is nearly done. I build one side at a time as I do not have enough magnets for everything. Besides I only like to work for 15 minutes or so then take a break. Come back in an hour and move everything over.
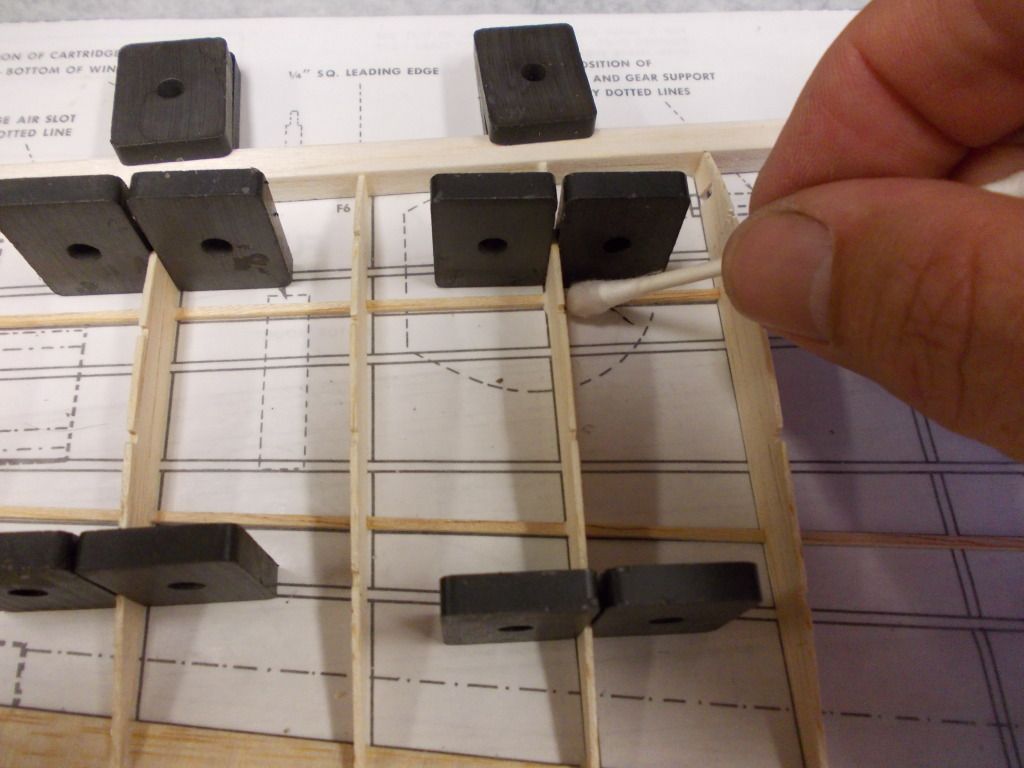
The little paper clips are holding down stringers that do not want to sit down in the notch fully.
Here I am dabbing up excess glue... Don't want more than required...
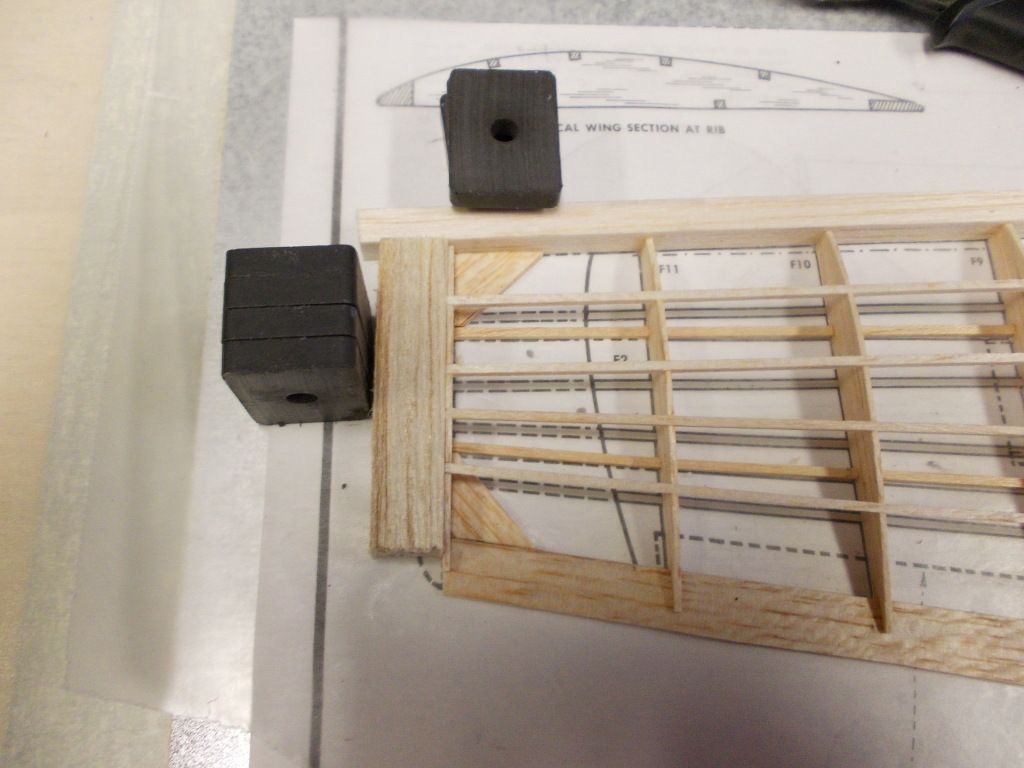
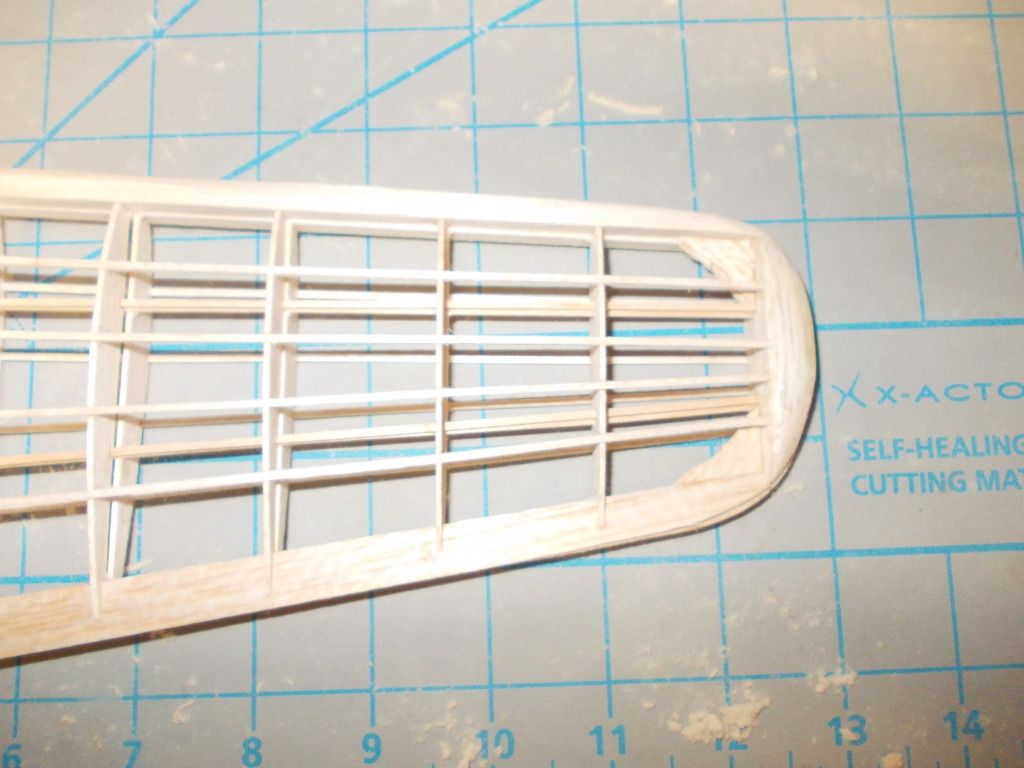
Here is a detail of the NEW DESIGNED WINGTIP It will be trimmed down as in drawings. It is solid balsa, but there will not be much left when it is to shape. It may look like I missed the bottom , but the new wing tip shape is different. Refer back to drawings of wing modification.
When Both wing sides where dry I just remove magnets and pick up the entire sheet of wax paper and set it aside. Then work on the center section.
After everything is dry I remove the wax paper... Here is the wing as it sits now...
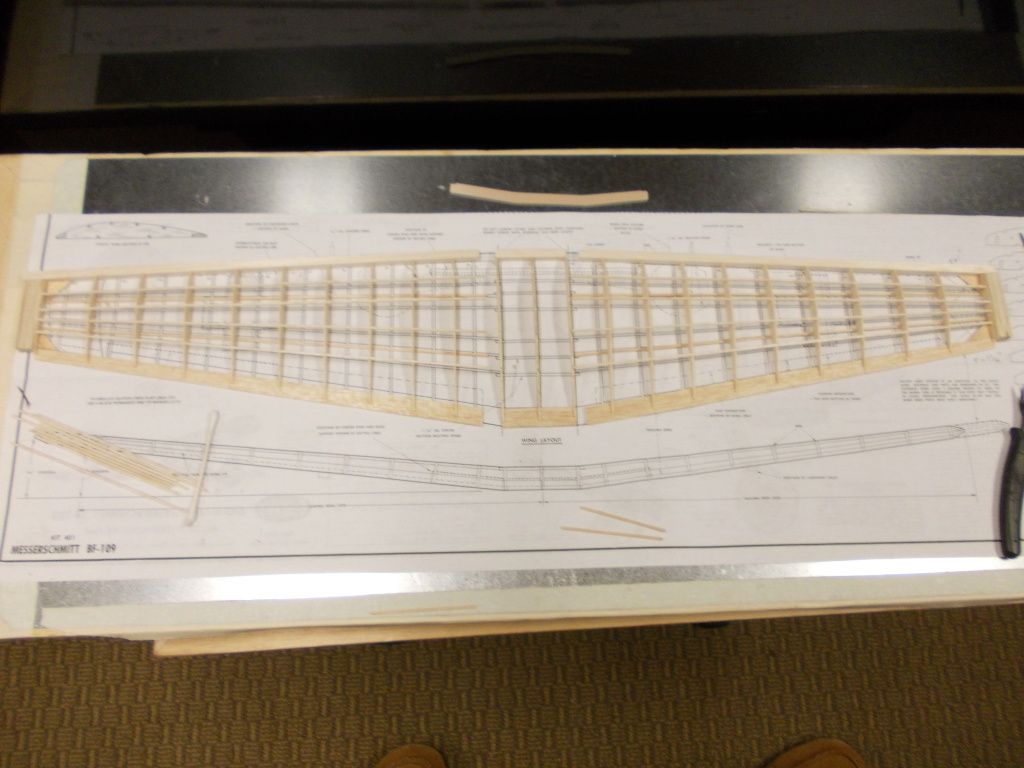
I will leave the wing sit for a bit longer. I hope to glue it together before Midnight... as there is more work on it and I don't want to loose a day. It will dry overnight, then I can Clean up the LE and Wingtips.
But for now I want it off the board as I want to get a start on the Fuselage... I will report on that and the follow up on the wing tomorrow.
If you need more information on something, just ask. I am trying to cover all aspects and have more pictures, but just posting a few that I feel shows the build. I hope to show new and old alike what it takes to make a good flyer. I am using some UNTESTED design features in this build to push the Bf109, to get the best flight possible.
Oberleintenat Mitch
PS. Got some work on the Fuselage. I just remembered I need more work on the wing and I am tired... Will do that first thing in the AM.
Here is the progress report for Day 2.
Wing is nearly done. I build one side at a time as I do not have enough magnets for everything. Besides I only like to work for 15 minutes or so then take a break. Come back in an hour and move everything over.
The little paper clips are holding down stringers that do not want to sit down in the notch fully.
Here I am dabbing up excess glue... Don't want more than required...
Here is a detail of the
When Both wing sides where dry I just remove magnets and pick up the entire sheet of wax paper and set it aside. Then work on the center section.
After everything is dry I remove the wax paper... Here is the wing as it sits now...
I will leave the wing sit for a bit longer. I hope to glue it together before Midnight... as there is more work on it and I don't want to loose a day. It will dry overnight, then I can Clean up the LE and Wingtips.
But for now I want it off the board as I want to get a start on the Fuselage... I will report on that and the follow up on the wing tomorrow.
If you need more information on something, just ask. I am trying to cover all aspects and have more pictures, but just posting a few that I feel shows the build. I hope to show new and old alike what it takes to make a good flyer. I am using some UNTESTED design features in this build to push the Bf109, to get the best flight possible.
Oberleintenat Mitch
PS. Got some work on the Fuselage. I just remembered I need more work on the wing and I am tired... Will do that first thing in the AM.
-
Mitch
- Posts: 1351
- Joined: Mon Aug 22, 2011 9:16 pm
- Location: Kent, WA
Re: Build a 400 series WW2 Fighter for less than $20
Day 2: 2345 hours update...
The project engineer could not sleep as he realized the extra work needed for the new wing tips... I was planning on gluing the wing together in the AM and realized I NEED to shape the wingtips... So I called in another shift before Midnight...
So I cut, and trimmed, shaped and sanded the wingtips to the Designers Specifications...
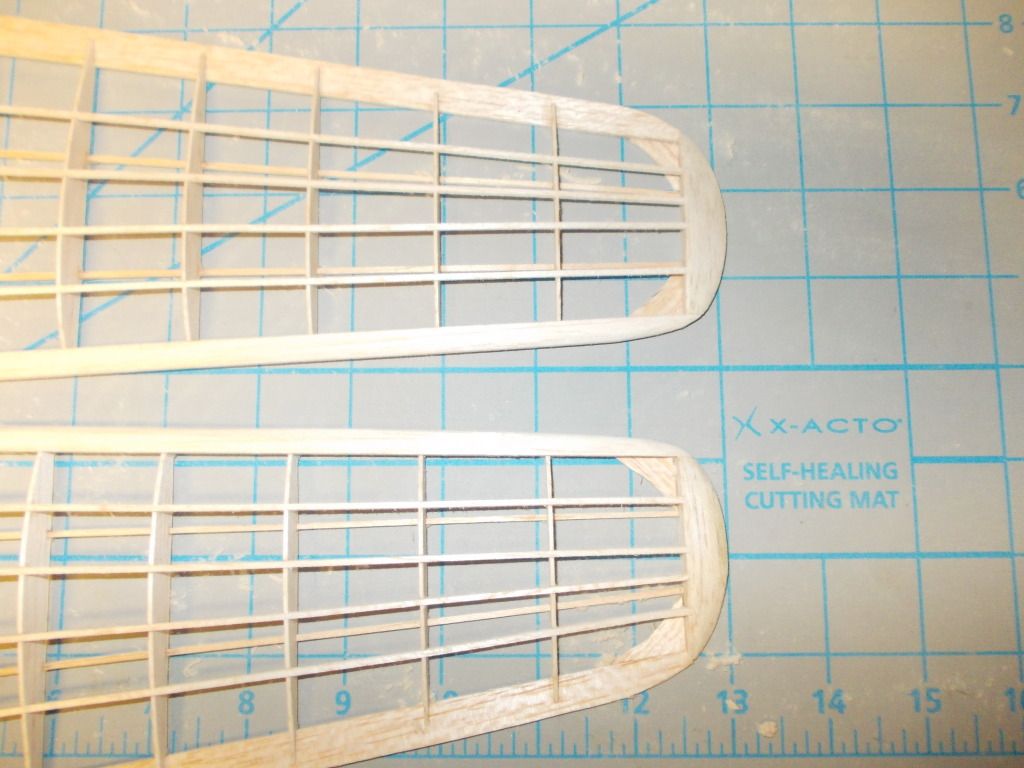
Placed them back to back to get pefect match on Port and Starboard Wing...
Then placed them on the Existing Flight Proven 109 for fittment and evaluation...
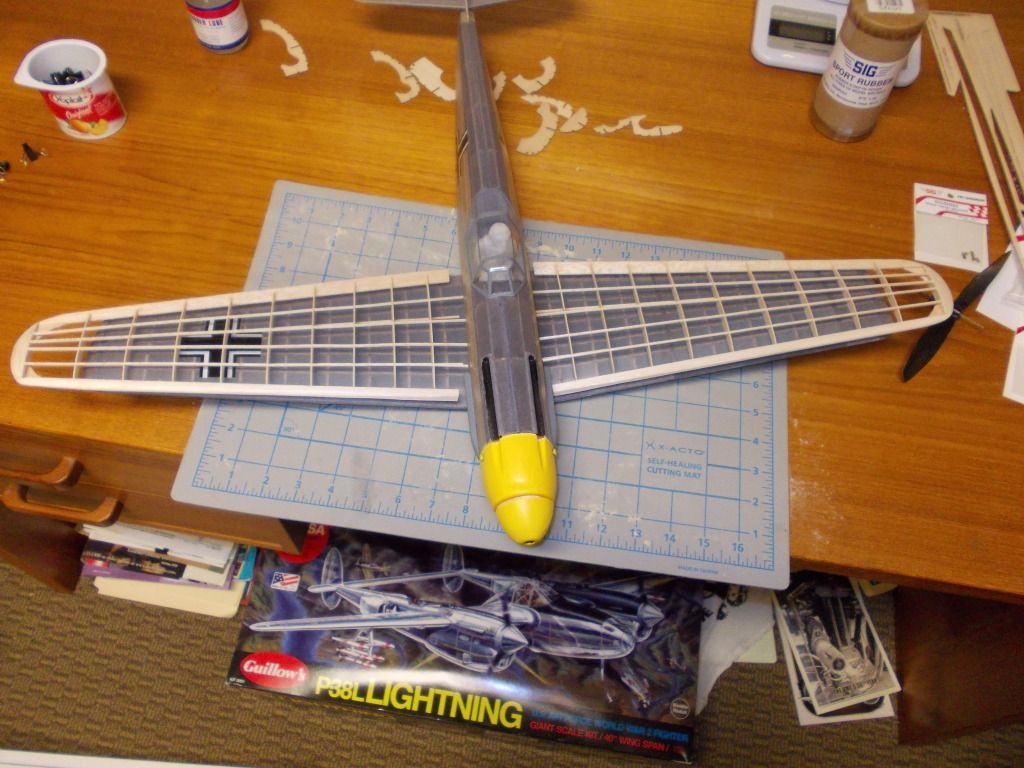
The Design Engineer is satisfified and can now get some rest... The wing will be finish sanded and built up first thing in the morning. I believe this plane will out perform the Mustang in all respects...
It's 2355 and I signing off... Mitch
PS. There are rumors of a new Twin Engine Guillow's Fighter Plane... but that only propaganda... stay tuned...
The project engineer could not sleep as he realized the extra work needed for the new wing tips... I was planning on gluing the wing together in the AM and realized I NEED to shape the wingtips... So I called in another shift before Midnight...
So I cut, and trimmed, shaped and sanded the wingtips to the Designers Specifications...
Placed them back to back to get pefect match on Port and Starboard Wing...
Then placed them on the Existing Flight Proven 109 for fittment and evaluation...
The Design Engineer is satisfified and can now get some rest... The wing will be finish sanded and built up first thing in the morning. I believe this plane will out perform the Mustang in all respects...
It's 2355 and I signing off... Mitch
PS. There are rumors of a new Twin Engine Guillow's Fighter Plane... but that only propaganda... stay tuned...
-
granpa
- Posts: 72
- Joined: Wed Feb 09, 2011 5:45 pm
- Location: Ellsworth WI
-
Mitch
- Posts: 1351
- Joined: Mon Aug 22, 2011 9:16 pm
- Location: Kent, WA
Re: Build a 400 series WW2 Fighter for less than $20
Hi Grandpa,
EasyBuiltModels.com That is where I get all my colored paper also.
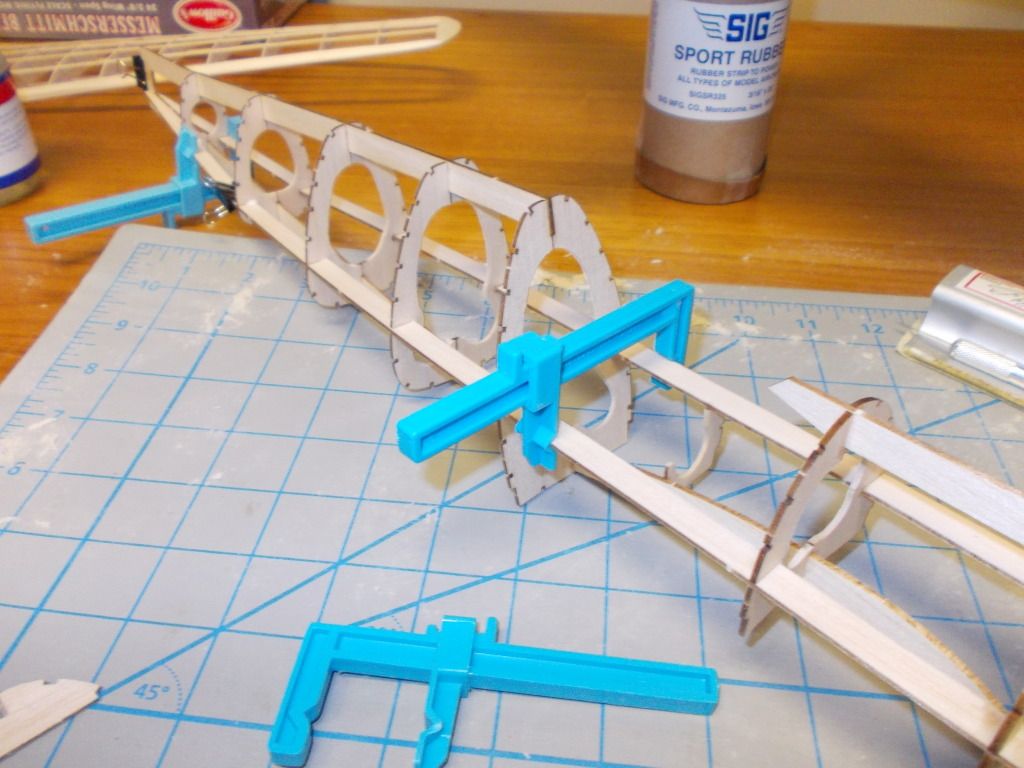
I will still use pins and my Guillow Board for the Tail as the parts are small and the Magnets can't get too close to each other...
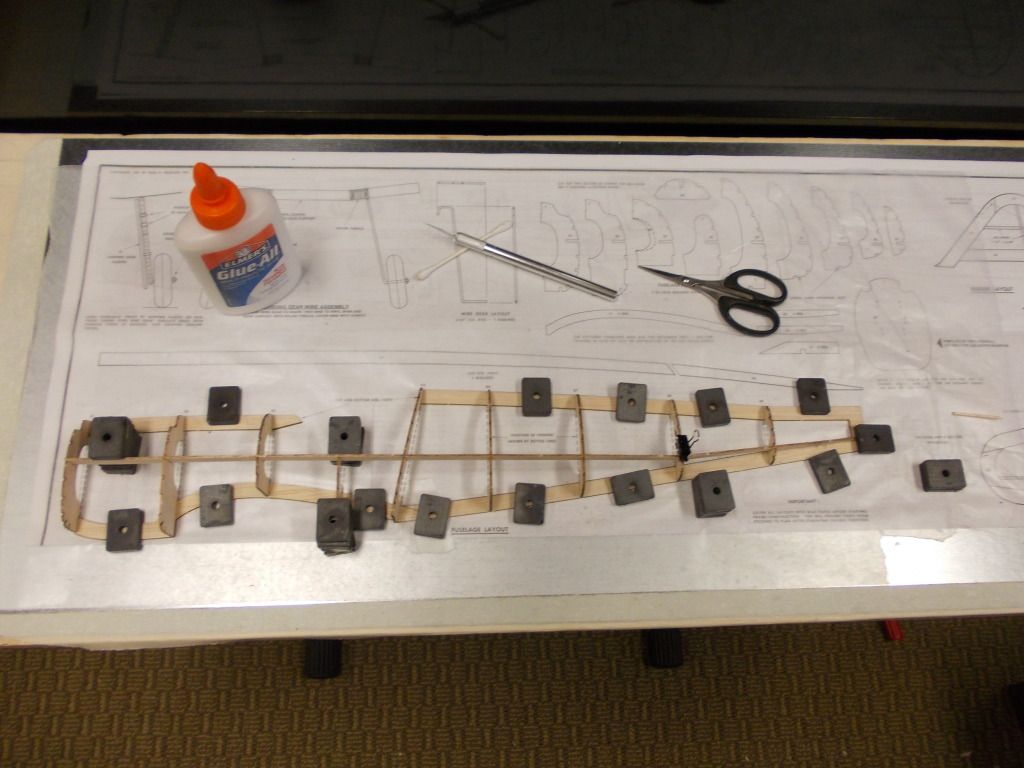
Morning report for Day 3...
So while I sanded the wingtips last night at the Midnight Hour I Finish the First Step of the Fuselage... Glue now dry it can come off the Magna Board and the Wing goes back on for Final Assembly and Diehdral Check... production schedule is ON TIME
Mitch
PS. Shaved off another gram in Fuselage frame modifications Full Report for Day 3 will be posted before Midnight PST 
EasyBuiltModels.com That is where I get all my colored paper also.
I will still use pins and my Guillow Board for the Tail as the parts are small and the Magnets can't get too close to each other...
Morning report for Day 3...
So while I sanded the wingtips last night at the Midnight Hour I Finish the First Step of the Fuselage... Glue now dry it can come off the Magna Board and the Wing goes back on for Final Assembly and Diehdral Check... production schedule is ON TIME
Mitch
PS. Shaved off another gram in
Last edited by Mitch on Fri Aug 10, 2012 5:16 pm, edited 1 time in total.
-
Mitch
- Posts: 1351
- Joined: Mon Aug 22, 2011 9:16 pm
- Location: Kent, WA
Re: Build a 400 series WW2 Fighter for less than $20
Update...
The Wings were checked, balanced and weighed. Each wing weighs 4g, Balance point is at Rib B7, They went though Quality control and passed as Mirror Images... Time for Build Up.
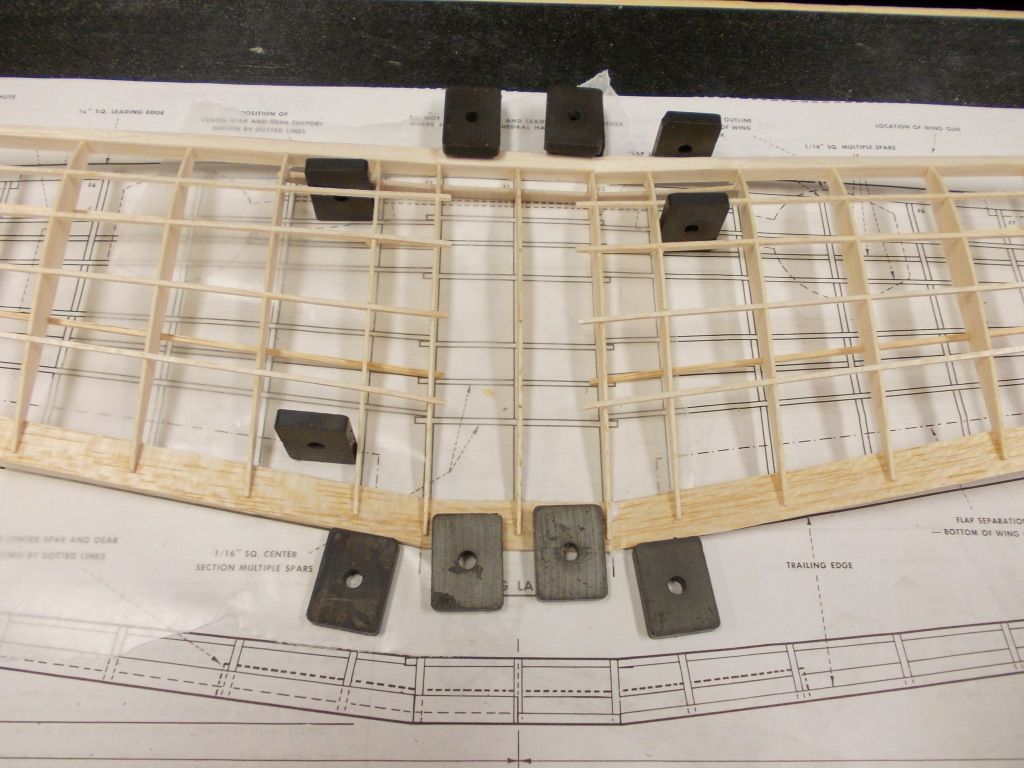
After the port wing was inserted, and after all the quality control checks, I had trouble inserting the Starboard wind. I decided NOT to force it. Let the glue set on the port side. After some time... Reinspected and found an alignment problem with the plastic wing brace. The solution was to open up the recieving slots in ribs B3 and B4. Then the starboard wing slid in smoothly. Diehdral is set and I need to do some chores... Will let this assemble dry, Then install all the spars over the center section.
Mitch
PS. Another note on Dad... I build these models because Airplanes were always a part of my life. I enjoy the Beauty of a Fighter Aircraft, because they are pushing technology to the limits... I am currently building Models of the Axis Powers, and made jokes about Col. Klink and such... My Dad fought in WW2 and it was not a joke or game. I think I can say for all of us we "Apprieciate what that Generation did, and we should NEVER forget!" My Dad was on SS 312, the USS Burrfish. SS 311 and SS 313 are amoung the 52 American Submarines that never came home and are still on "The Eternal Patrol" .
The Wings were checked, balanced and weighed. Each wing weighs 4g, Balance point is at Rib B7, They went though Quality control and passed as Mirror Images... Time for Build Up.
After the port wing was inserted, and after all the quality control checks, I had trouble inserting the Starboard wind. I decided NOT to force it. Let the glue set on the port side. After some time... Reinspected and found an alignment problem with the plastic wing brace. The solution was to open up the recieving slots in ribs B3 and B4. Then the starboard wing slid in smoothly. Diehdral is set and I need to do some chores... Will let this assemble dry, Then install all the spars over the center section.
Mitch
PS. Another note on Dad... I build these models because Airplanes were always a part of my life. I enjoy the Beauty of a Fighter Aircraft, because they are pushing technology to the limits... I am currently building Models of the Axis Powers, and made jokes about Col. Klink and such... My Dad fought in WW2 and it was not a joke or game. I think I can say for all of us we "Apprieciate what that Generation did, and we should NEVER forget!" My Dad was on SS 312, the USS Burrfish. SS 311 and SS 313 are amoung the 52 American Submarines that never came home and are still on "The Eternal Patrol" .
-
Mitch
- Posts: 1351
- Joined: Mon Aug 22, 2011 9:16 pm
- Location: Kent, WA
Re: Build a 400 series WW2 Fighter for less than $20
Day 3... MidDay Report...
The wing has all top center braces in place and needs to be left alone for a bit...When it comes off the board I will install bottom braces. Just a bit tight for me to reach down there and I don't want to break any spars!
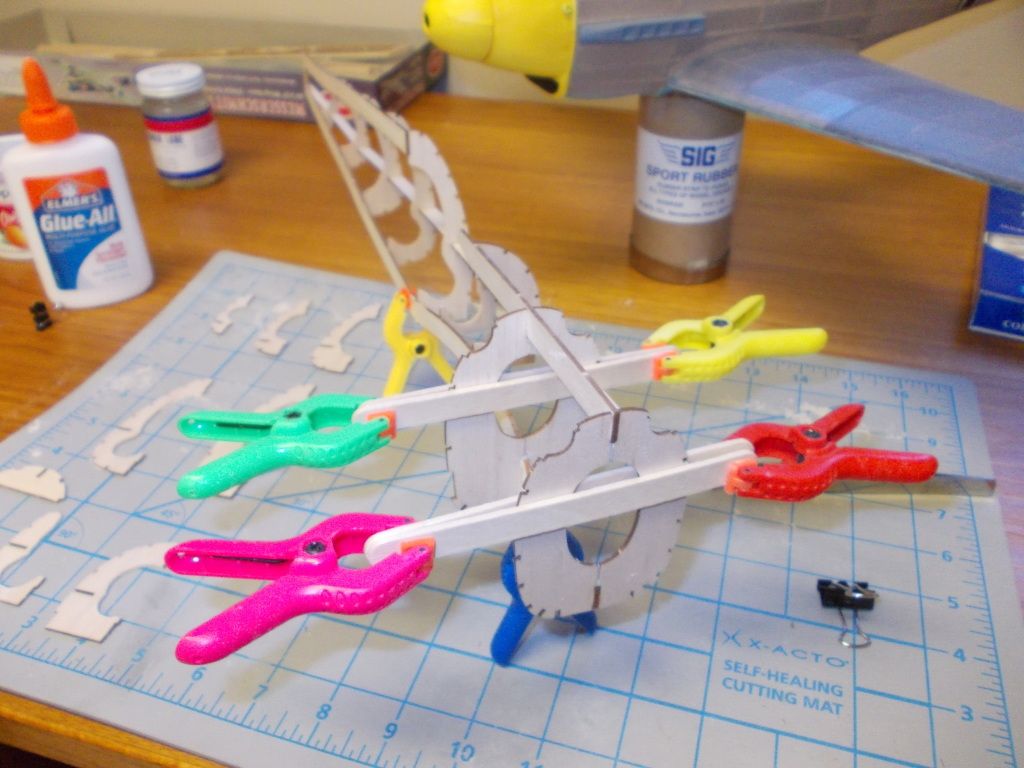
So with the Fuselage moving down the assembly line is being fitted with Starboard Side... (Is it just me... It seems no matter how many clamps I have I wish I had a few more. I will have to wait for glue to cure, then move clamps down the model. All Fuselage Frames have been sanded. First two are left intact, the remainder have had excess weight removed. I don't need to remove weight from front and after flight tests of Bf109E, sometimes the plane spirals in and hits the ground nose first. Need to keep the Nose strong.
I am thinking about the position of the rear peg. I am thinking to install 2 Braces. One at the B7-B8 position (as per plan), and another at the B6-B7 position. That way I could move the peg and use different motors. I don't think it would be much of a sacrifice for added weight. My model 109E has the peg hole between B8-B9. I will not do that on the 109F.
Mitch
The wing has all top center braces in place and needs to be left alone for a bit...When it comes off the board I will install bottom braces. Just a bit tight for me to reach down there and I don't want to break any spars!
So with the Fuselage moving down the assembly line is being fitted with Starboard Side... (Is it just me... It seems no matter how many clamps I have I wish I had a few more. I will have to wait for glue to cure, then move clamps down the model. All Fuselage Frames have been sanded. First two are left intact, the remainder have had excess weight removed.
Mitch
Last edited by Mitch on Fri Aug 10, 2012 5:20 pm, edited 1 time in total.
-
Wildpig
- Posts: 529
- Joined: Thu Jan 26, 2012 9:41 am
Re: Build a 400 series WW2 Fighter for less than $20
Mitch wrote:
Mitch
I think that would be an excellent idea.
-
Mitch
- Posts: 1351
- Joined: Mon Aug 22, 2011 9:16 pm
- Location: Kent, WA
Re: Build a 400 series WW2 Fighter for less than $20
Day 3 Evening...
Tail Done, needs sanding...
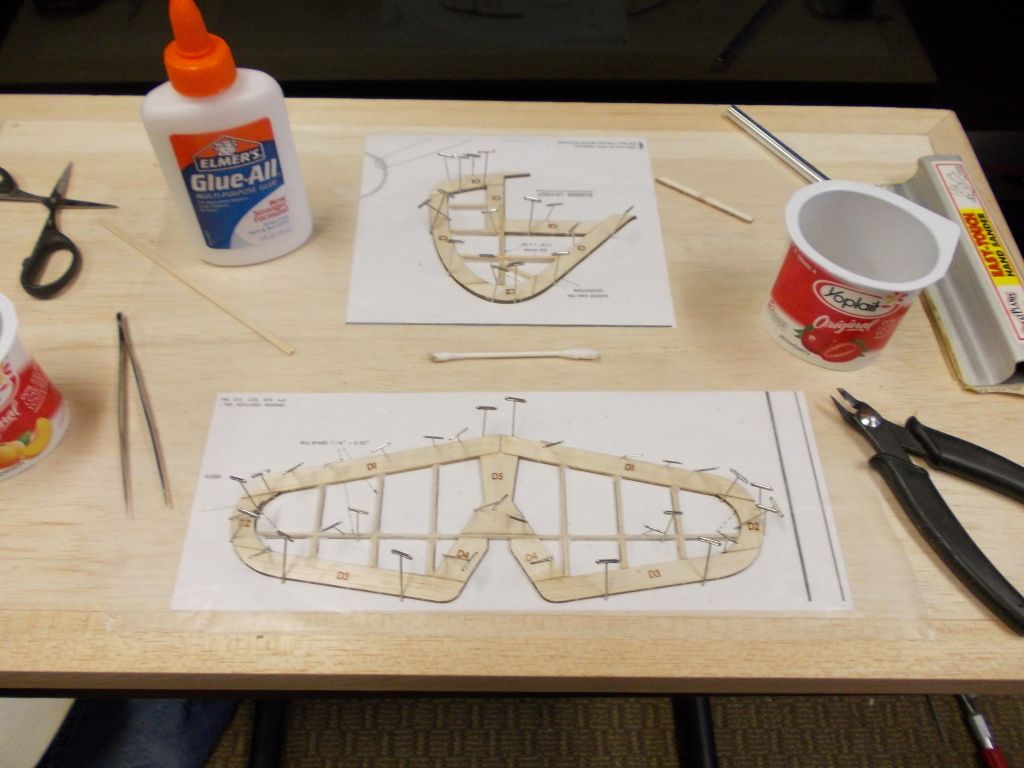
I was going to build this by lamination. Will do that later.
Fuselage Assembled, needs stringers...
I plan to run some stringers tonight.
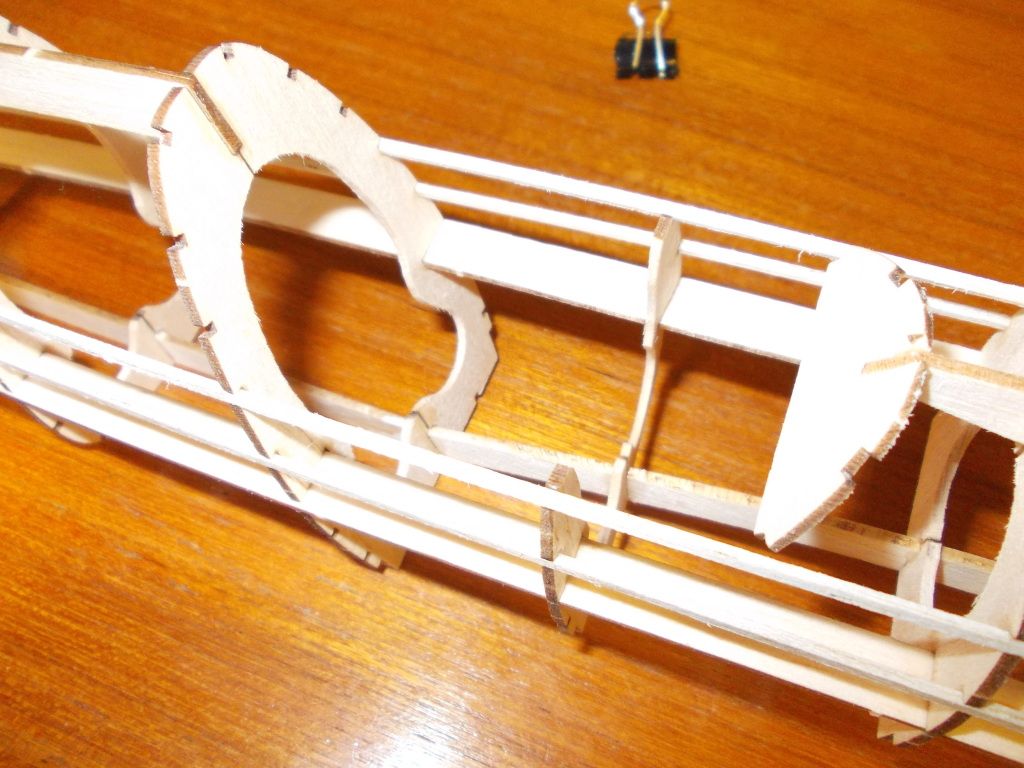
Skelaton Mock-Up...You can see the lightened frames in this shot.

Remember I built an entire new light weight wing! Wing weighs 12g. Needs a bit more shaping in the center section.
Plan to run some stringers tonight...
Mitch
I hope I am not getting her too fragile... But F=Ma. Force = Mass X Acceleration... I hope She will be light enough (Mass) and come in for slow landings (Acceleration) then the Force on her body will be minimal and not do any damage. I enjoy understanding the Math and Physics involved and then putting it to the Real World Test. I ran 4 stringers and going to call it a day... Still need to refer to the plan to see how those stringers go.
Tail Done, needs sanding...
I was going to build this by lamination. Will do that later.
Fuselage Assembled, needs stringers...
I plan to run some stringers tonight.
Skelaton Mock-Up...You can see the lightened frames in this shot.
Remember I built an entire new light weight wing! Wing weighs 12g. Needs a bit more shaping in the center section.
Plan to run some stringers tonight...
Mitch
Last edited by Mitch on Sat Aug 11, 2012 12:09 am, edited 1 time in total.
-
Pauli72
- Posts: 127
- Joined: Fri Dec 16, 2011 9:36 am
- Location: Wisconsin
Re: Build a 400 series WW2 Fighter for less than $20
Friedrich is sure shaping up nicely Mitch!  Excellent clean building techniques.
I really like the North Africa Luftwaffe look of a Me-109. Were you able to find tissue to somewhat match the desert camo brown patern?
Keep up the great work! Love the build log & photos.
I really like the North Africa Luftwaffe look of a Me-109. Were you able to find tissue to somewhat match the desert camo brown patern?
Keep up the great work! Love the build log & photos.
-
Mitch
- Posts: 1351
- Joined: Mon Aug 22, 2011 9:16 pm
- Location: Kent, WA
Re: Build a 400 series WW2 Fighter for less than $20
Thanks Pauli and Everyone,
Yes, I have all the colors I need. Of course I have to make comprimises without paint, but Easy Built Models offers a large selection on Military Colors.
So her is my Prototype...
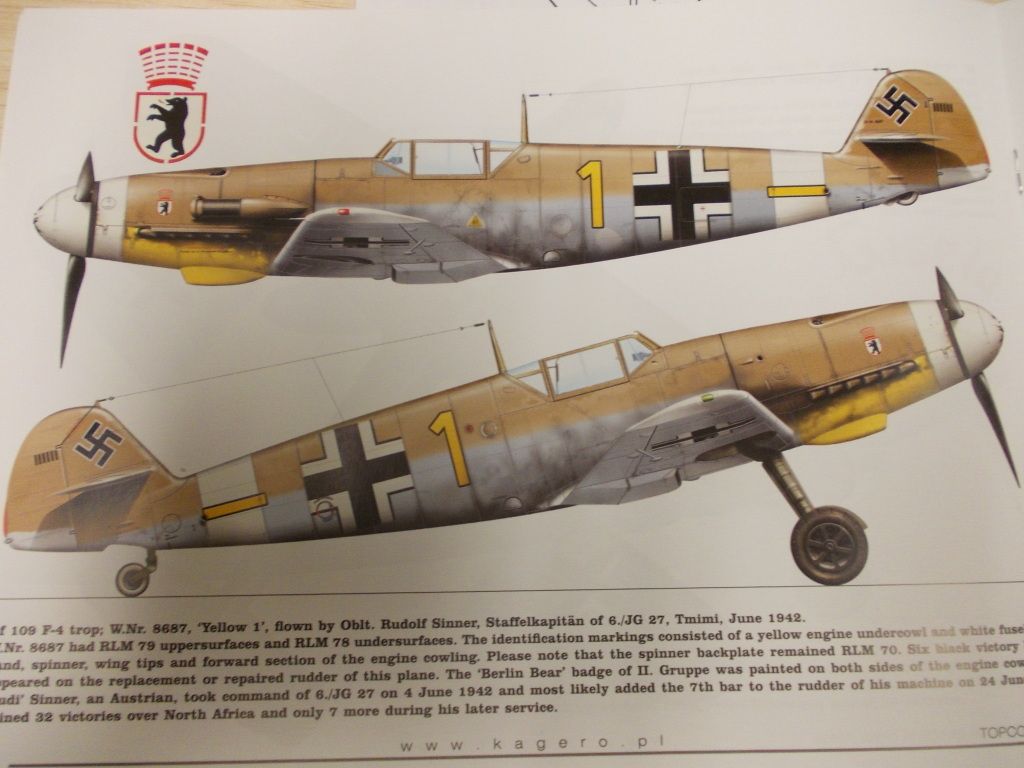
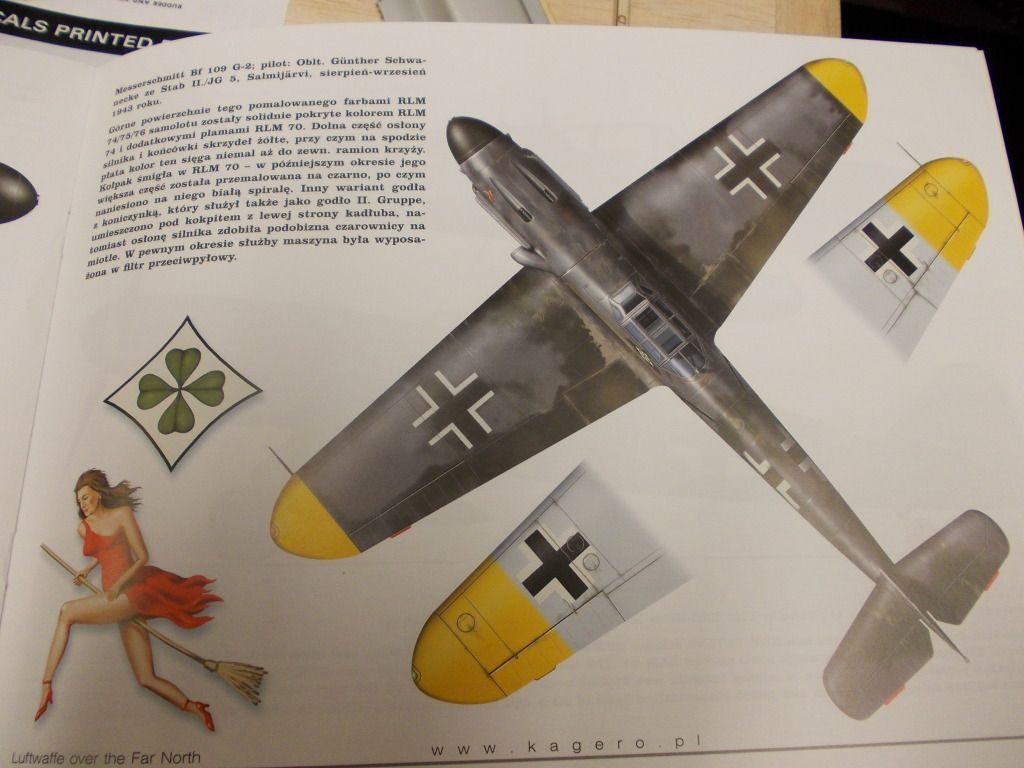
And here is the paper I will use...

I plan to use a different unit insignia, and other slight changes, but that is the theme...
Also have plans for the next generation Gernot... as I plan to follow my advice to buy some kit parts and build for less $ per model!
Mitch
Yes, I have all the colors I need. Of course I have to make comprimises without paint, but Easy Built Models offers a large selection on Military Colors.
So her is my Prototype...
And here is the paper I will use...
I plan to use a different unit insignia, and other slight changes, but that is the theme...
Also have plans for the next generation Gernot... as I plan to follow my advice to buy some kit parts and build for less $ per model!
Mitch
-
Mitch
- Posts: 1351
- Joined: Mon Aug 22, 2011 9:16 pm
- Location: Kent, WA
Re: Build a 400 series WW2 Fighter for less than $20
Day 4, Morning Engineers Meeting
Production report from last night... Fuselage Frames assemblied, 4 stringers run on frame. Discovered fit problem of BB part...
Did I do something wrong... That is usually the case with Lazer Cut parts... I plan to recut and enlarge the BB part on 1/32 and innstall after morning coffee. I will also make the Rear Bulkhead out of 1/32 balsa, in Emil I used 1/16. This is a design change as it comes from Guillows this part of the Fuselage is created by the plastic canopy. Okay if you paint your model. Since I use colored paper, and can not match paper to plastic well, I made the adjustment. This was an after thought on Emil during final assembly. So those stringer had short pieces added. On Fredrich this will be installed at this stage with continuous stringers.
Here is a picture of Emil's cockpit:
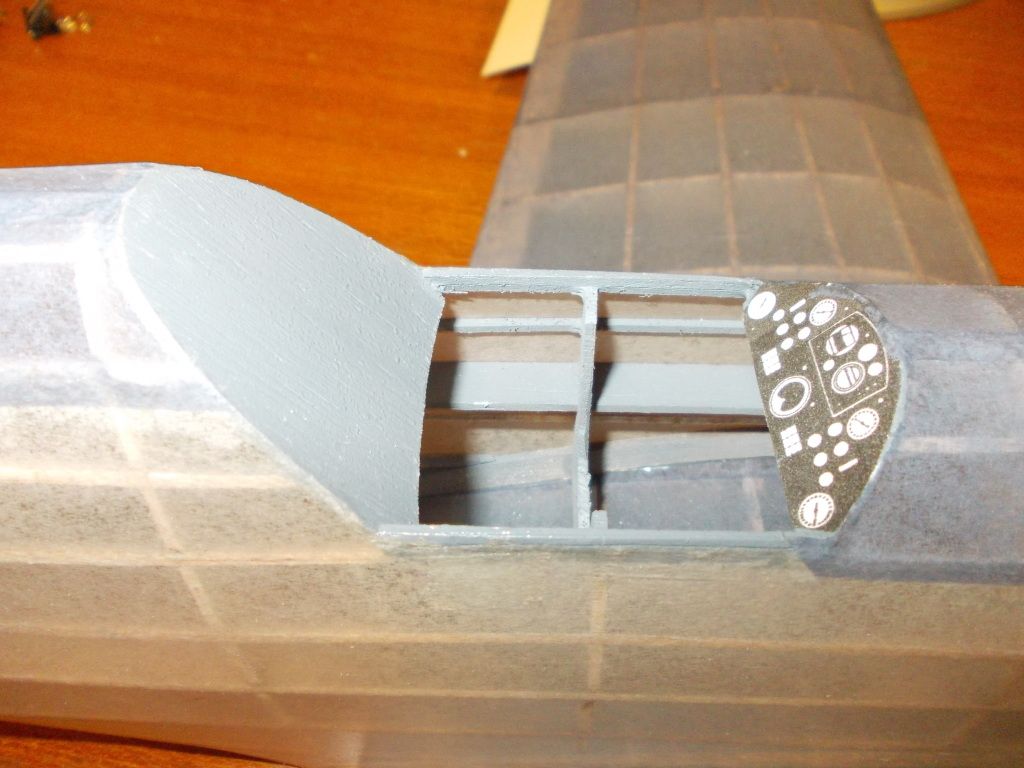
Now that I am looking at this second photo I think I added a 1/16 stinger to the cockpit coming, I will evaluate the new contruction again...
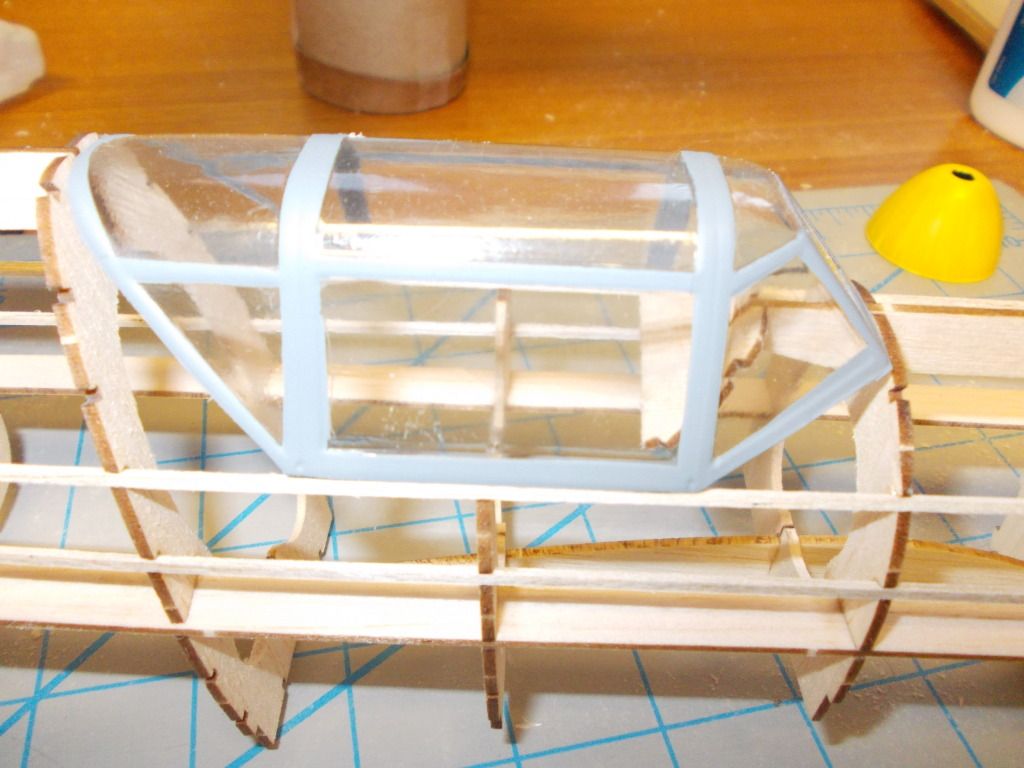
So I look at the Bluuprint from Guillows and do not see it, but it is there on Emil. So... 1. Add a top stinger for the canopy to grab on. 2. I will recut BB anyway as I still think it will be short. Make out of 1/32 sheet. Make Rear Bulkhead at same time using canopy as guide.
I should get going it's after 0800 and the shop whistle just blew...
Meeting Adjorned... Time to get to work...
Day 4 schedule is to finish Fuselage, also need to sand, shape and finish tail section...
Mitch
Production report from last night... Fuselage Frames assemblied, 4 stringers run on frame. Discovered fit problem of BB part...
Did I do something wrong... That is usually the case with Lazer Cut parts... I plan to recut and enlarge the BB part on 1/32 and innstall after morning coffee. I will also make the Rear Bulkhead out of 1/32 balsa, in Emil I used 1/16.
Here is a picture of Emil's cockpit:
Now that I am looking at this second photo I think I added a 1/16 stinger to the cockpit coming, I will evaluate the new contruction again...
So I look at the Bluuprint from Guillows and do not see it, but it is there on Emil. So... 1. Add a top stinger for the canopy to grab on. 2. I will recut BB anyway as I still think it will be short. Make out of 1/32 sheet. Make Rear Bulkhead at same time using canopy as guide.
I should get going it's after 0800 and the shop whistle just blew...
Meeting Adjorned... Time to get to work...
Day 4 schedule is to finish Fuselage, also need to sand, shape and finish tail section...
Mitch