Kit# 204 Fokker Dr. 1 Build With Pictures

Ask other modelers for a little help / knowledge ?
Post Reply
Arlo DiPasquale
Posts: 207
Joined: Tue Jun 10, 2008 9:22 am
Location: Minneapolis, MN

Kit# 204 Fokker Dr. 1 Build With Pictures

Post by Arlo DiPasquale »

Here are some pics of my most recent build, the 20" wingspan Fokker Dr. 1 (Kit# 204). Its been really fun so far.

Image

Image

Image

Image

Image

Image

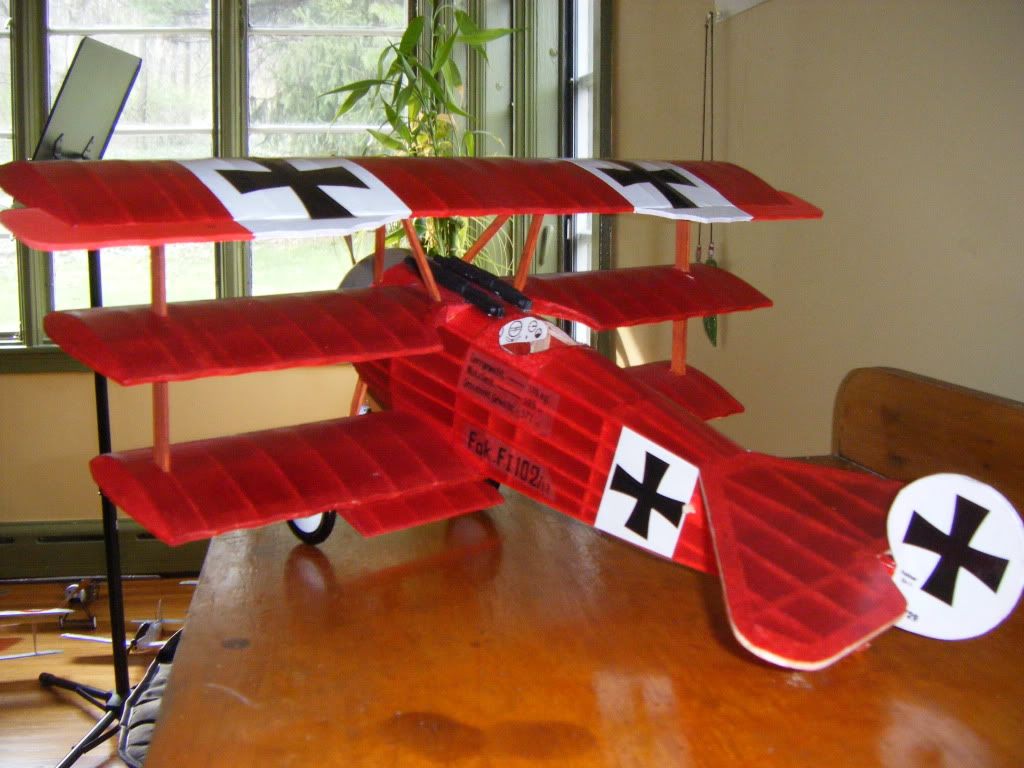
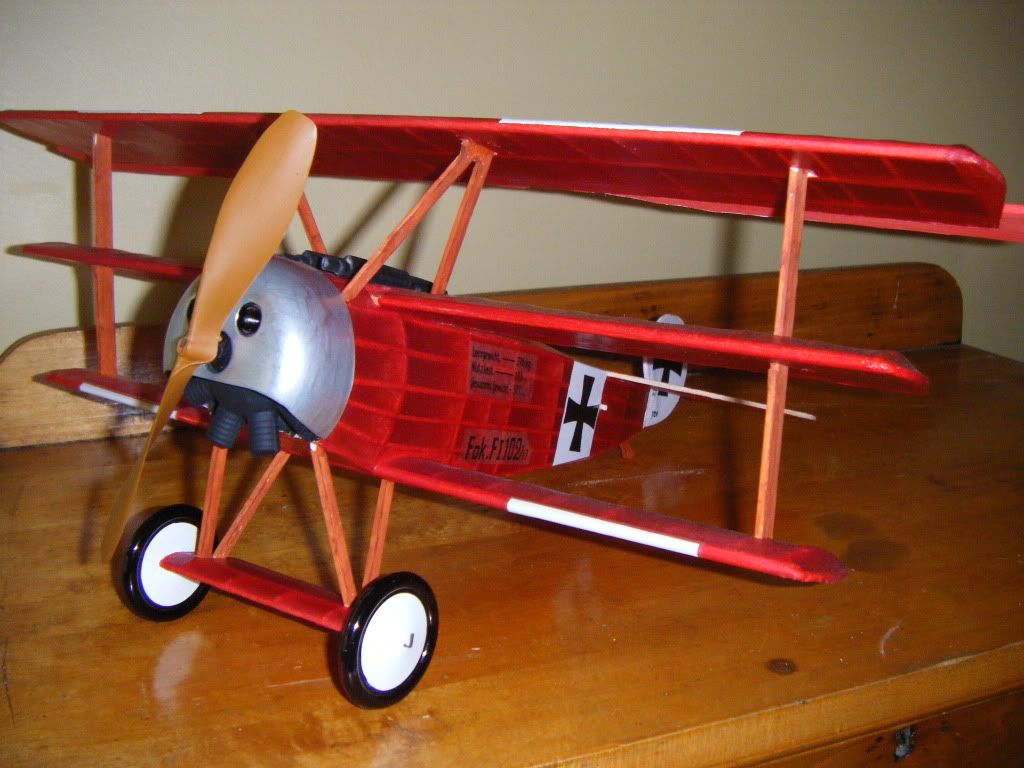
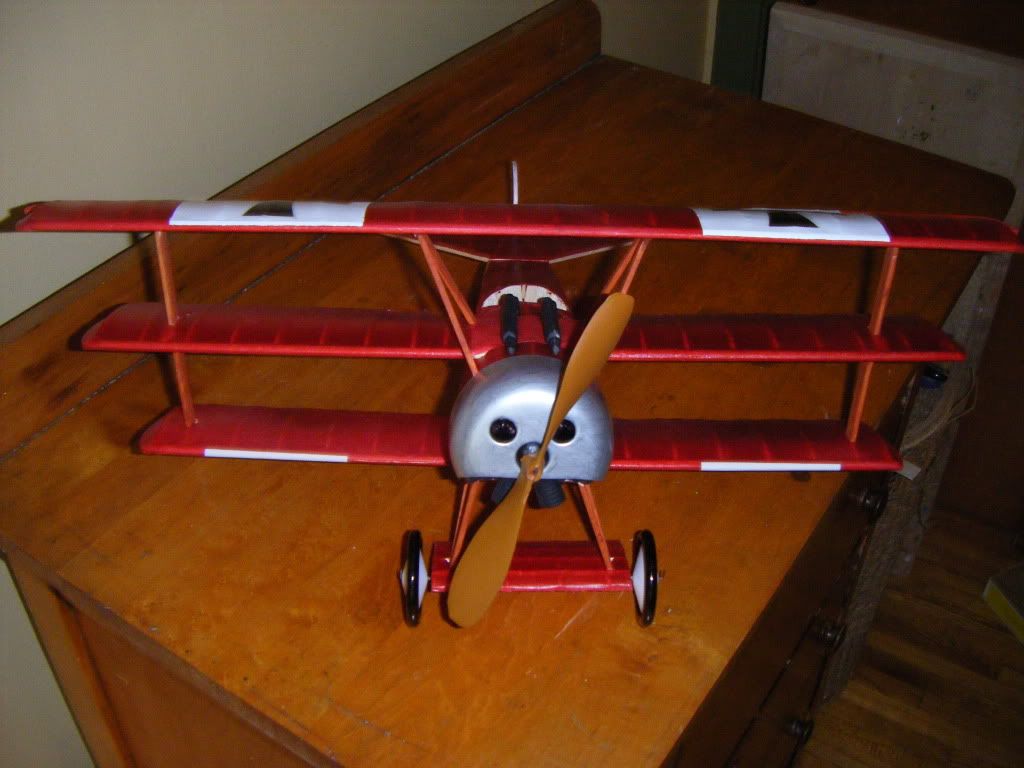
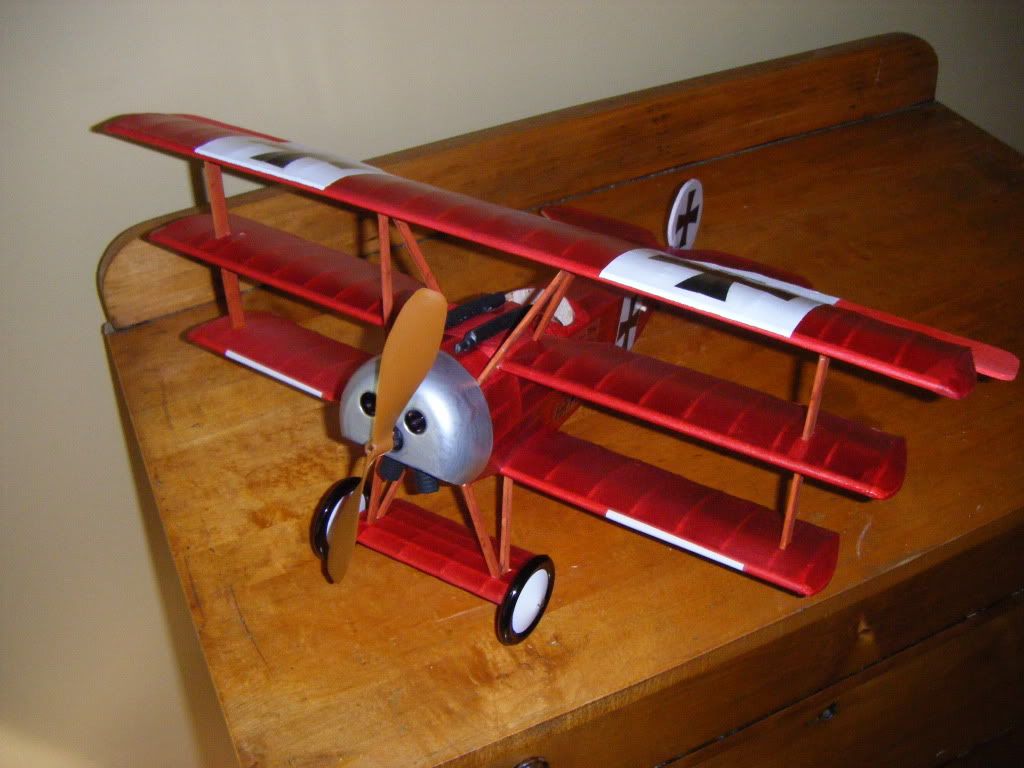
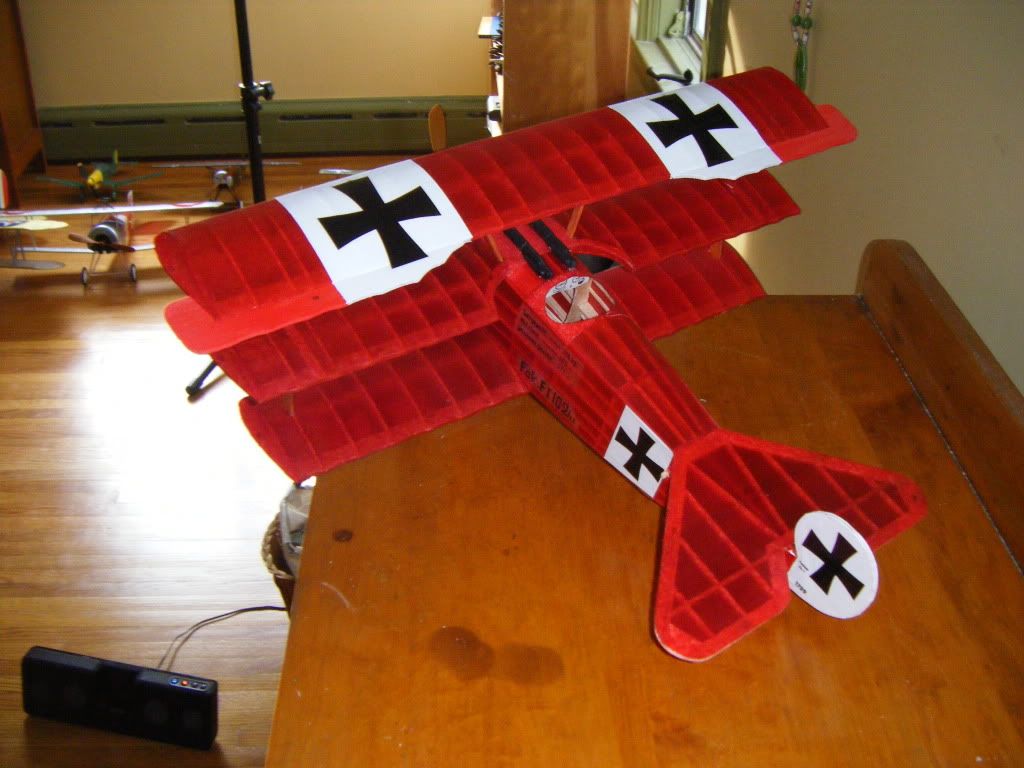
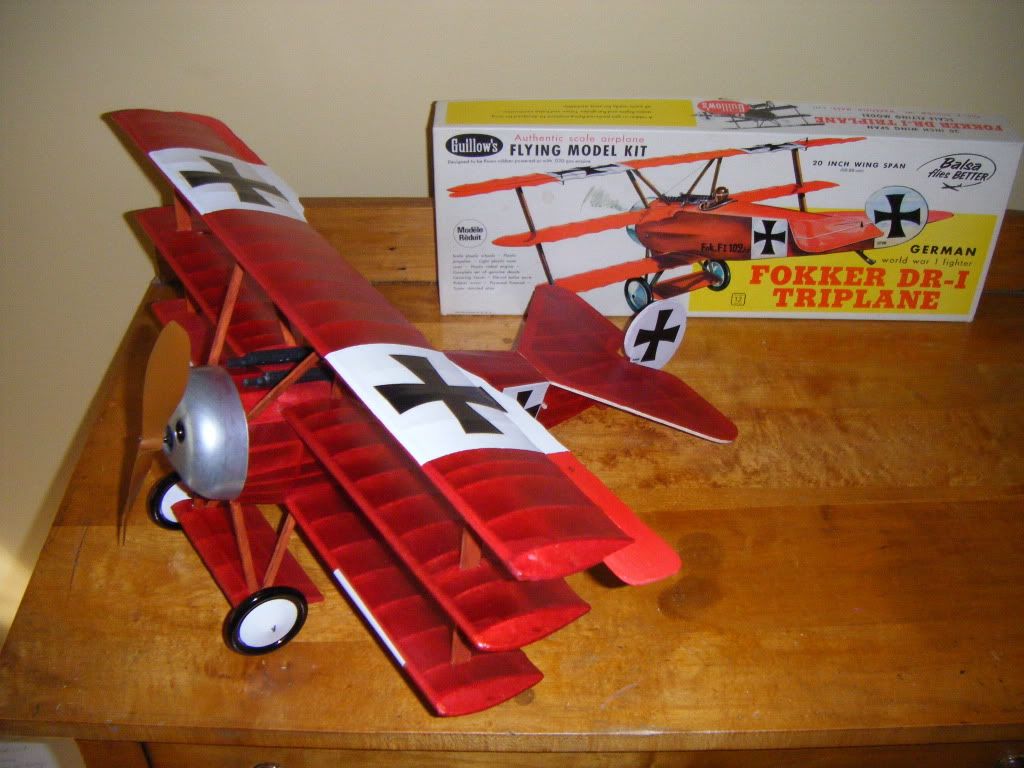
The color scheme will be red with white and black iron crosses on the fuselage, wings and rudder, a silver nose cowl and white wheels; nothing special, but a bright red triplane is always a head turner! More pictures to come later. :mrgreen:
ADW 123
Posts: 1158
Joined: Mon Feb 22, 2010 5:22 pm
Location: Cincinnati, Ohio

Re: Kit# 204 Fokker Dr. 1 Build With Pictures

Post by ADW 123 »

I really like this kit. There was one thing that i found to be a problem. the wing struts are 3/32" thickness. ok. now look where the struts but up againts the wing ribs where the slots are made. the instructions suggest to take a couple of 1/16" sq. strips and glue them on either side of these slots, so then the struts can be slid into place easily. well... only one problem with that. the thickness of that slot after those strips go on is 1/16", as that is the thickness of the wing ribs. the wing rib where those slots are must be 3/32" so then the struts can be placed. Just a heads up. i ran into that on my built and it was a head scratcher....
H65 Driver
Posts: 52
Joined: Tue Feb 10, 2009 3:52 pm

Re: Kit# 204 Fokker Dr. 1 Build With Pictures

Post by H65 Driver »

That's what they make x-acto knives and sandpaper for.
ADW 123
Posts: 1158
Joined: Mon Feb 22, 2010 5:22 pm
Location: Cincinnati, Ohio

Re: Kit# 204 Fokker Dr. 1 Build With Pictures

Post by ADW 123 »

its still a design flaw
Arlo DiPasquale
Posts: 207
Joined: Tue Jun 10, 2008 9:22 am
Location: Minneapolis, MN

Re: Kit# 204 Fokker Dr. 1 Build With Pictures

Post by Arlo DiPasquale »

I realized that too, actually all 200 series kits have the same problem. I recall that on my Dumas F9C Sparrowhawk that I built about 6 months ago that the kit design calls for a partial rib to but up against the full rib, then for the 1/16" strips to be glued to that. I don't know hard that would be for Guillow's to retrofit it to the 200 series kits, but t works really well.
Wildpig
Posts: 529
Joined: Thu Jan 26, 2012 9:41 am

Re: Kit# 204 Fokker Dr. 1 Build With Pictures

Post by Wildpig »

It would be easy to make your own short rib for a spacer. Use the existing rib as a pattern or the pattern on the plans.
Arlo DiPasquale
Posts: 207
Joined: Tue Jun 10, 2008 9:22 am
Location: Minneapolis, MN

Re: Kit# 204 Fokker Dr. 1 Build With Pictures

Post by Arlo DiPasquale »

I know its easy, but it would just be nice if sometime down the road, the error was corrected in the actual kit. With that said, I have no real complaints about the 200 series kits. The frames go together cleanly, and when it comes time for assembly, they are super easy to assemble, especially the Dr. 1. I could not say that about all kits.
Arlo DiPasquale
Posts: 207
Joined: Tue Jun 10, 2008 9:22 am
Location: Minneapolis, MN

Re: Kit# 204 Fokker Dr. 1 Build With Pictures

Post by Arlo DiPasquale »

Finished build pics.
Image

Image

Image

Image

Image

Image

Next up will be the Beechcraft Muskeeter. More to come later.
Wildpig
Posts: 529
Joined: Thu Jan 26, 2012 9:41 am

Re: Kit# 204 Fokker Dr. 1 Build With Pictures

Post by Wildpig »

Ssssuuuuhhhwweeeett! You are going to submit photos of it to Guillow for Model of the Month, right?
Pauli72
Posts: 127
Joined: Fri Dec 16, 2011 9:36 am
Location: Wisconsin

Re: Kit# 204 Fokker Dr. 1 Build With Pictures

Post by Pauli72 »

That is awsome Arlo!!!! 8)

I second what Wildpig said, definately put that one in for Guillow's Model of the Month!

Did you use dope for the tissue on this one, or the glue stick & 50/50 glue/water?
Arlo DiPasquale
Posts: 207
Joined: Tue Jun 10, 2008 9:22 am
Location: Minneapolis, MN

Re: Kit# 204 Fokker Dr. 1 Build With Pictures

Post by Arlo DiPasquale »

I used 50/50 white glue and water to attach the tissue to the frames, then sprayed it with rust-o-leum clear finish to stiffen the paper and give it a more finished look.
Bill Gaylord
Posts: 904
Joined: Sun Nov 09, 2008 1:29 pm
Location: Grove City PA

Re: Kit# 204 Fokker Dr. 1 Build With Pictures

Post by Bill Gaylord »

Wildpig wrote:Ssssuuuuhhhwweeeett! You are going to submit photos of it to Guillow for Model of the Month, right?
Definitely deserves it, but I've found the selections to be a bit questionable at times, hint, hint Guillows. A pretty background with trees and flowers seems to help, especially being in the outdoors. Then again, I tried that with my SE5A, which used to be the photo for the spare parts page, but didn't get Photo of the Month.

Seriously, it is a great job. You've reminded me that I need to get my rc version of this plane out again and fly it. I made some adjustment to hopefully help with the roller coaster scenario that it had. Another than that, not a bad flyer.
Are you going to try to fly this plane with rubber power? They do fly.
You do not have the required permissions to view the files attached to this post.
Arlo DiPasquale
Posts: 207
Joined: Tue Jun 10, 2008 9:22 am
Location: Minneapolis, MN

Re: Kit# 204 Fokker Dr. 1 Build With Pictures

Post by Arlo DiPasquale »

I submitted a pic for the model picture of the month contest. Whether it wins or not doesn't matter much to me, since the most fun part for me is building the models. After they're done, they're kinda fun to show other people, but for me, the best part is a clean slate (or workboard, rather) to start a new project.
Arlo DiPasquale
Posts: 207
Joined: Tue Jun 10, 2008 9:22 am
Location: Minneapolis, MN

Re: Kit# 204 Fokker Dr. 1 Build With Pictures

Post by Arlo DiPasquale »

Personally I'd rather see an 8 year old with his or her first model than any of my models. I remember when I first started building models about 7 years ago, when I was 10, I always needed a pat on the back to get me to continue. The first couple models I started I never finished simply because I made mistakes and did not have the perseverance to go back and fix it. But when I finished my first successful model (the 500 series Hellcat) I felt so proud simply to get it done. After that, finishing the models was easy, but I have a feeling if I had looked at the pictures of other people my age with their completed models, I may have finished a couple of planes before the Hellcat!
Arlo DiPasquale
Posts: 207
Joined: Tue Jun 10, 2008 9:22 am
Location: Minneapolis, MN

Re: Kit# 204 Fokker Dr. 1 Build With Pictures

Post by Arlo DiPasquale »

I also forgot to add that I love going on the picture page and seeing modelers with their first build. To keep companies like Guillow's in business, people my age and younger have to become interested in modelbuildng, which is extremely hard with video games and other such distractions that did not exist during the heyday of balsa model airplanes. For kids younger than me to see their peers building models is probably the best way to get them to try building one of their own.
Post Reply