The Butcher Bird... the FW 190
-
jpuke
- Posts: 75
- Joined: Wed May 04, 2011 8:03 am
- Location: Lincoln, NE
Re: The Butcher Bird... the FW 190
I don't want to hijack Mitch's thread, but I have heard about lightening, or keeping light, the tail surfaces. So far I have built the fuselage and wings and weight is around 40 g (I haven't weighed anything since final sanding). I'm contemplating making adjustable tail surfaces but I know that it makes them heavier to have the extra wood and hinges. We'll see. I do appreciate all the advice and tips I get on this forum and I plan on posting my P-51 build as I get closer to the end.
-
Mitch
- Posts: 1351
- Joined: Mon Aug 22, 2011 9:16 pm
- Location: Kent, WA
Re: The Butcher Bird... the FW 190
It's too late for me to lighten the rear of the fuselage. I did however rebuild the tail of this plane as seen in the first few photos. This plane started with the rear peg moved aft of the Guillow design. I also moved that forward 2 bays, so now it is FWD of the Guillow design. In my next NEW build I will lighten all the Frames and Structure AFT of the peg as much as possible.
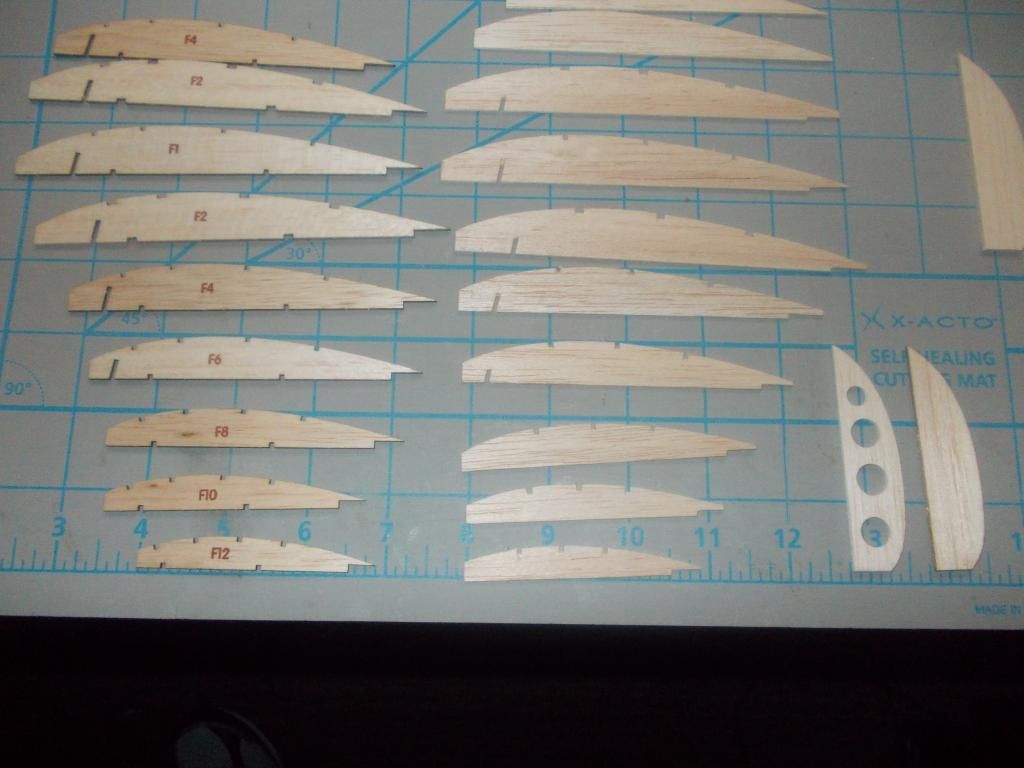
Since this plane is still an experiment and development for me and my building techniques, I am now making a new wing with 1/32 ribs, and 1/16 "E" parts... Also lightening up the Wing tips. I will only use the even numbered ribs plus F1.
I also plan to add more dihedral to the wing.
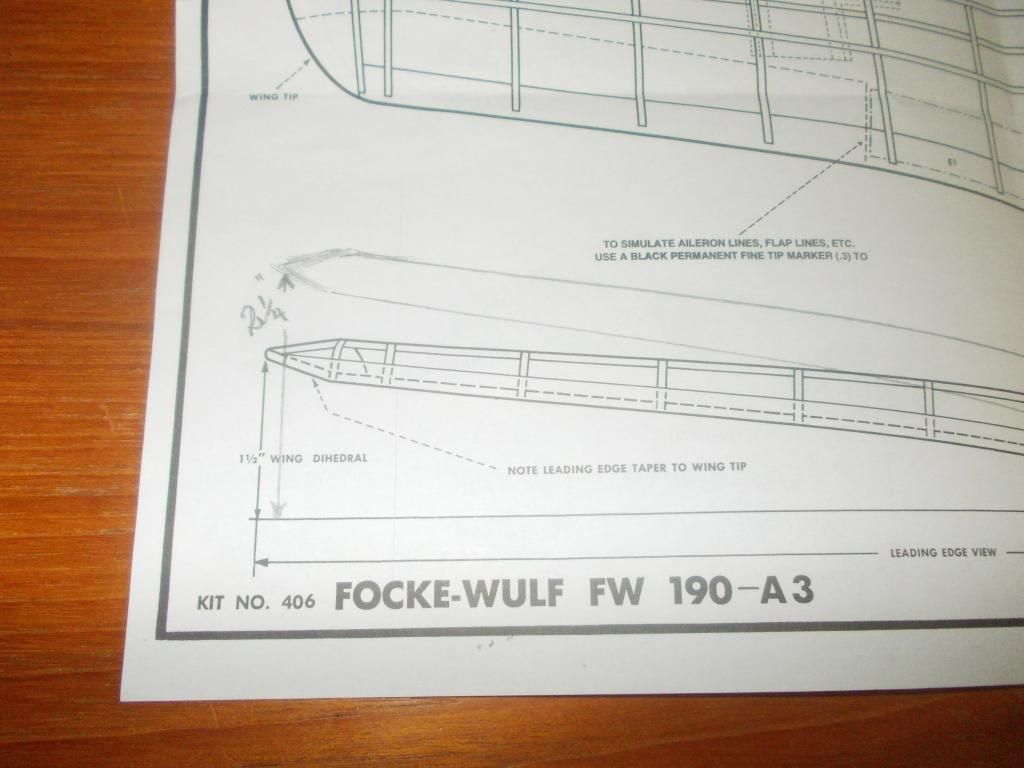
I was hoping for 2-1/4 " to bring the wingtips up to the bottom of the canopy, but...
I used the plastic from the kit and can only manage about 2 inches.
I will see how that will do and in my NEW build I will use plywood or basswood for the wing brace.
Mitch
PS I weighed one of my NEW friends model from FAC... his model weighed 40g... That's finished! w/o motor... BUT these are VERY fragile models!
My models are okay for Kids to play with...
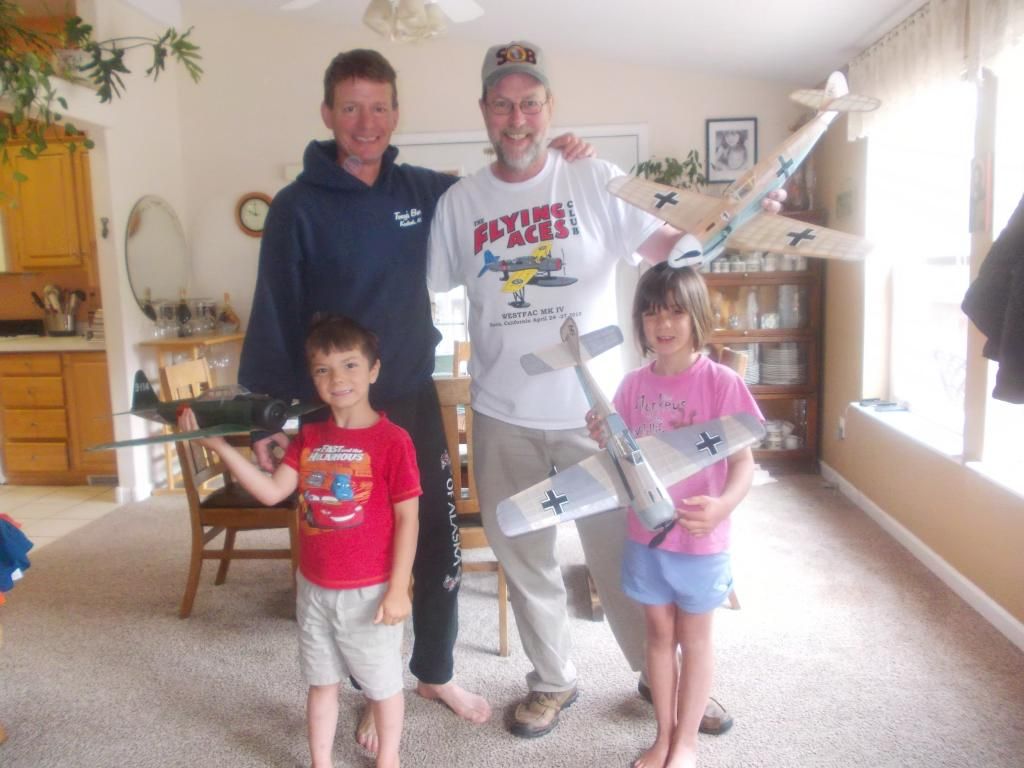
Picture from a stop on the way home from WESTFAC IV
Since this plane is still an experiment and development for me and my building techniques, I am now making a new wing with 1/32 ribs, and 1/16 "E" parts... Also lightening up the Wing tips. I will only use the even numbered ribs plus F1.

I also plan to add more dihedral to the wing.

I was hoping for 2-1/4 " to bring the wingtips up to the bottom of the canopy, but...

I used the plastic from the kit and can only manage about 2 inches.
I will see how that will do and in my NEW build I will use plywood or basswood for the wing brace.
Mitch
PS I weighed one of my NEW friends model from FAC... his model weighed 40g... That's finished! w/o motor... BUT these are VERY fragile models!
My models are okay for Kids to play with...

Picture from a stop on the way home from WESTFAC IV
-
jpuke
- Posts: 75
- Joined: Wed May 04, 2011 8:03 am
- Location: Lincoln, NE
Re: The Butcher Bird... the FW 190
The first day I sat down to build my P-51 I decided to put some lightening holes in the fuselage formers but ended up splitting B1 instantly on both halves so I gave up on that, thinking I'll see what will happen. I did build a 500 series Hellcat a while back and I used the parts from the kit as templates for cutting out new parts, worked great because the wood was so hard. I should have done that here. Oh well.
-
Mitch
- Posts: 1351
- Joined: Mon Aug 22, 2011 9:16 pm
- Location: Kent, WA
Re: The Butcher Bird... the FW 190
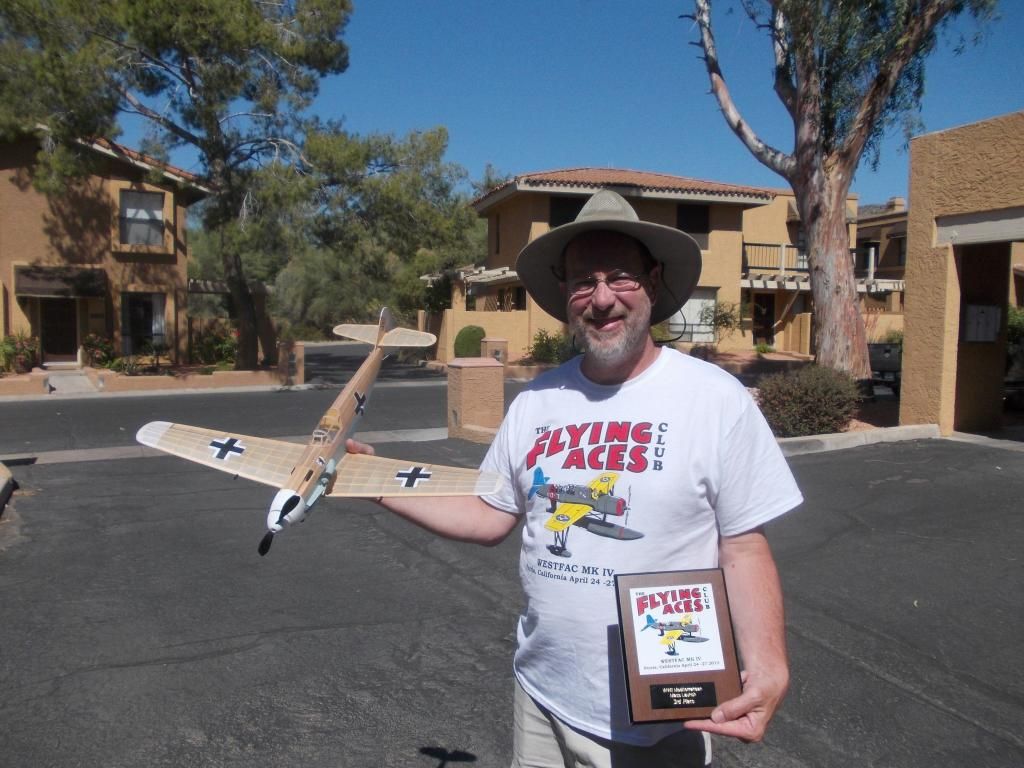
If you have not looked at my build thread of the Bf109, take a look. (Build a 400 series for $20) I removed a lot of wood from the frames...and that's the plane that got me a Third place...Now I am trying to improve on that.
I just broke a wingtip and had to make another... When my new "Butcher Bird" is finished it will NOT be for kids. Mitch
UPDATE:
Now that's starting to look like a competition wing...
LE is 3/16 sq instead of 1/4
Ribs are 1/32 instead of 1/16
TE is 1/16 instead of 3/32
I will also use half of the stringers and scallop the TE when finished.
When I purchase my balsa I bring a scale as there is quite a difference in weight. The other guys at FAC do not even buy balsa at the hobby shops... They get the "Good Stuff" by mail order only... Competition grade... at least I am now weighing my parts... I will cut my own stringers also... Mitch
I just broke a wingtip and had to make another... When my new "Butcher Bird" is finished it will NOT be for kids. Mitch
UPDATE:
Now that's starting to look like a competition wing...

LE is 3/16 sq instead of 1/4
Ribs are 1/32 instead of 1/16
TE is 1/16 instead of 3/32
I will also use half of the stringers and scallop the TE when finished.
When I purchase my balsa I bring a scale as there is quite a difference in weight. The other guys at FAC do not even buy balsa at the hobby shops... They get the "Good Stuff" by mail order only... Competition grade... at least I am now weighing my parts... I will cut my own stringers also... Mitch
-
Bill Gaylord
- Posts: 904
- Joined: Sun Nov 09, 2008 1:29 pm
- Location: Grove City PA
Re: The Butcher Bird... the FW 190
Yep, the contest grade wood is the most important change. I recently built a P51 wing using all contest wood that was well worth the effort of cutting new formers. The entire wing with sculpted wingtips, full 1/32" top sheeting, sheeting on the wing bottom about 1-1/2" rearward, and aileron servo/cable was only 55gms. I've come out not much lighter than that, using the stock Guillows wood, without adding sheeting and aileron servo/linkage.
-
Mitch
- Posts: 1351
- Joined: Mon Aug 22, 2011 9:16 pm
- Location: Kent, WA
Re: The Butcher Bird... the FW 190
A response to "jpuke"...
I built ALL the 400 series kits last year, my P-51 was covered in Silver tissue, and 2 coats of clear dope... I used colored tissue for all the other kits.
If you use the silkspan from the kit, and then paint silver... I believe yours will be heavier.
I just weighed my P-51 now, and with a short motor... it's at 99 grams. I had several VERY nice flights with the Guillow supplied rubber in my local school yard. Some were very nice indeed.
My P-51 was entered in the WW2 "Mass Launch" event but I was out in the first round (3 rounds)
I believe if you build your model well and reasonably light you can expect a nice flight.
I am now trying to build models to a different level... That is to enter into flight contests for timed flights... I am still learning and hope to share what I have learned and will take advice from those who offer.
Mitch...Keep Building... Keep Flying
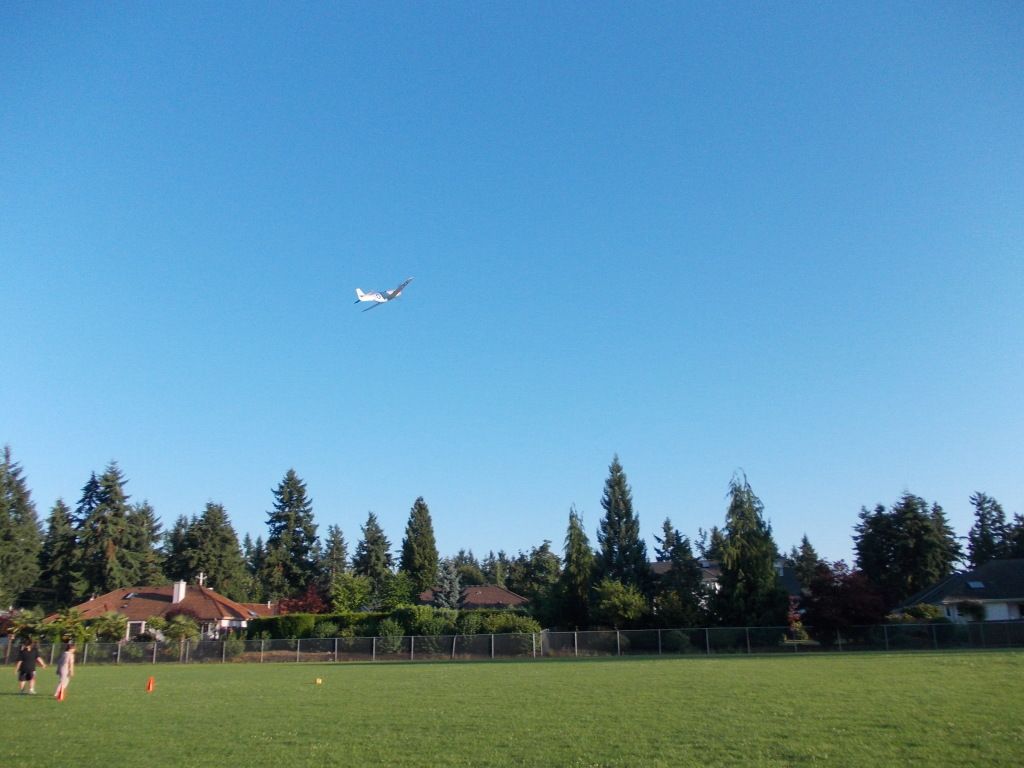
Here is my P-51, built as per Guillows plans flying over my school yard, with Guillows rubber:
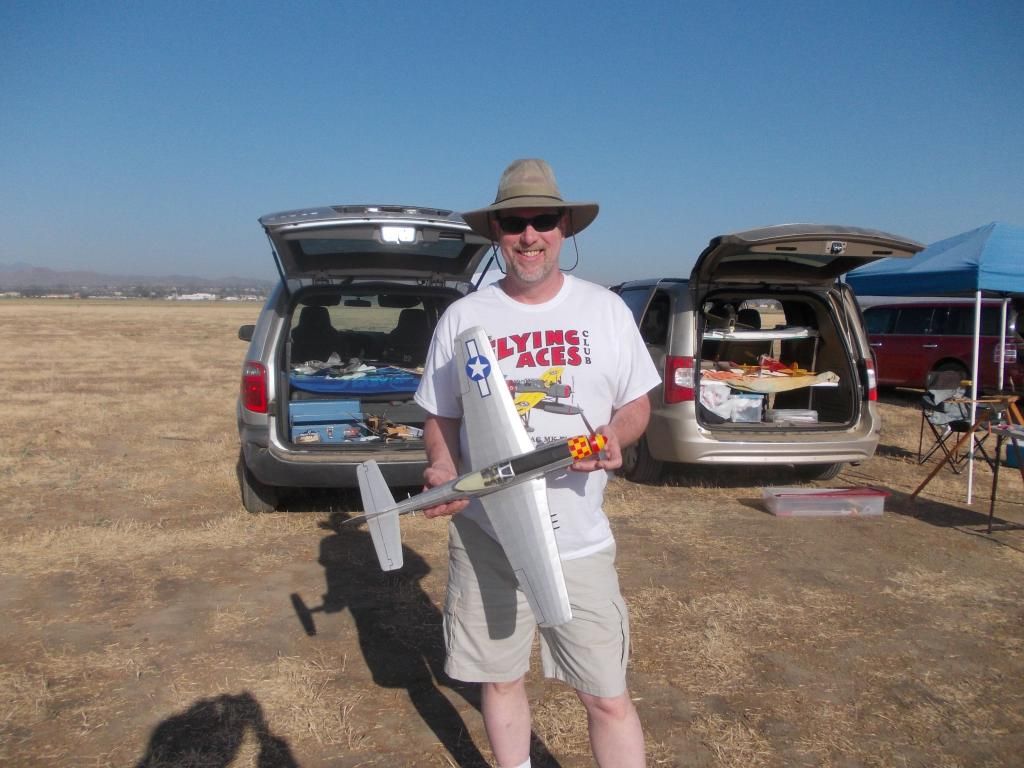
Here I am with the same plane at the Nationals in Perris, CA:
To build light follow how I "Built a 400 series for $20" My Bf 109 was much lighter and I got 3rd place in "WW2 Mediterranean Theatre"
I am trying to improve on that... Keep Trying...
I built ALL the 400 series kits last year, my P-51 was covered in Silver tissue, and 2 coats of clear dope... I used colored tissue for all the other kits.
If you use the silkspan from the kit, and then paint silver... I believe yours will be heavier.
I just weighed my P-51 now, and with a short motor... it's at 99 grams. I had several VERY nice flights with the Guillow supplied rubber in my local school yard. Some were very nice indeed.
My P-51 was entered in the WW2 "Mass Launch" event but I was out in the first round (3 rounds)
I believe if you build your model well and reasonably light you can expect a nice flight.
I am now trying to build models to a different level... That is to enter into flight contests for timed flights... I am still learning and hope to share what I have learned and will take advice from those who offer.
Mitch...Keep Building... Keep Flying
Here is my P-51, built as per Guillows plans flying over my school yard, with Guillows rubber:

Here I am with the same plane at the Nationals in Perris, CA:

To build light follow how I "Built a 400 series for $20" My Bf 109 was much lighter and I got 3rd place in "WW2 Mediterranean Theatre"

I am trying to improve on that... Keep Trying...
-
meku
- Posts: 14
- Joined: Fri Apr 12, 2013 8:05 am
- Location: Poland
Re: The Butcher Bird... the FW 190
Mitch, congratulations and I wish you success, beautiful work!
I used to be a player but very fast floating models.
I used to be a player but very fast floating models.
-
Mitch
- Posts: 1351
- Joined: Mon Aug 22, 2011 9:16 pm
- Location: Kent, WA
Re: The Butcher Bird... the FW 190
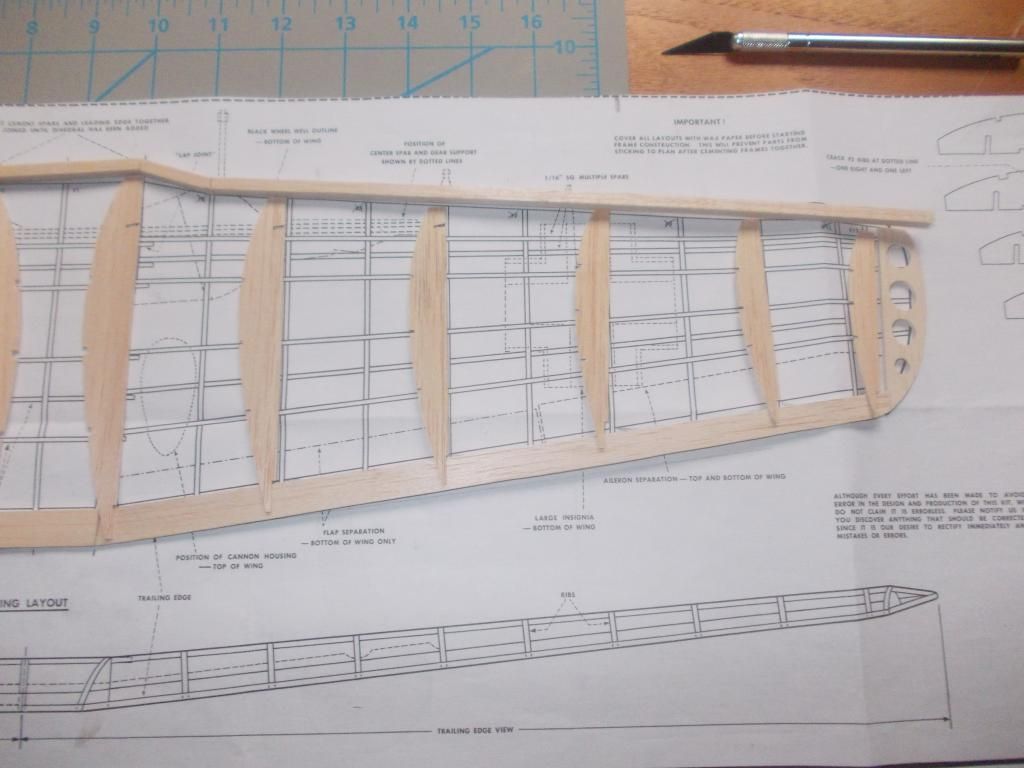
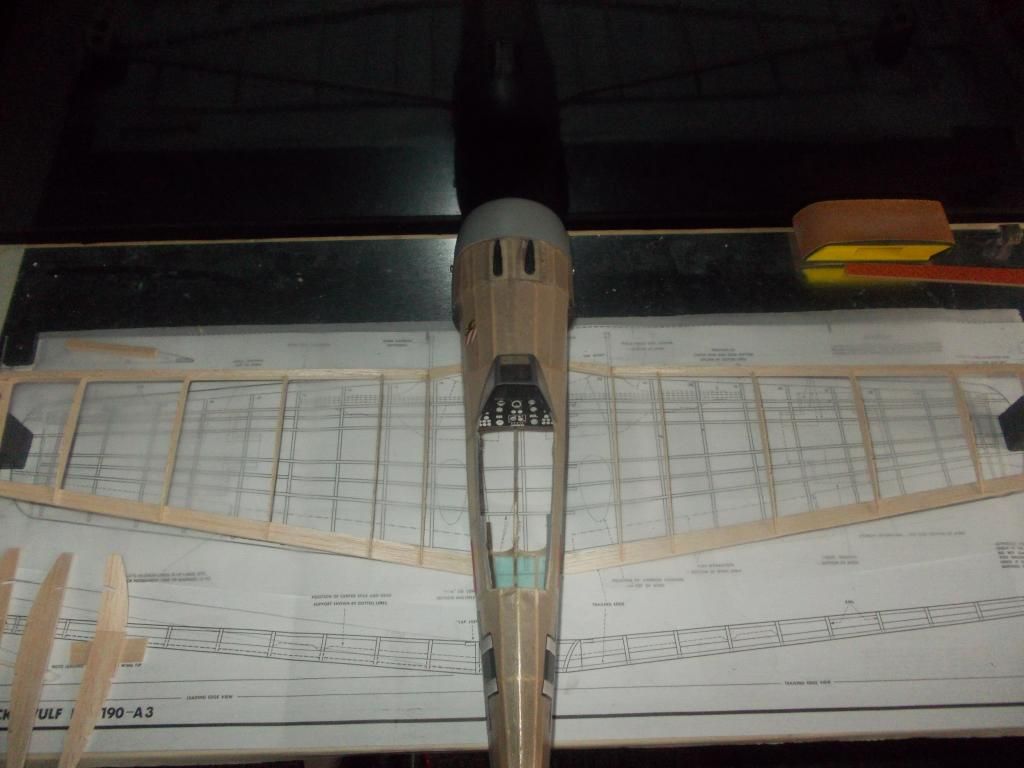
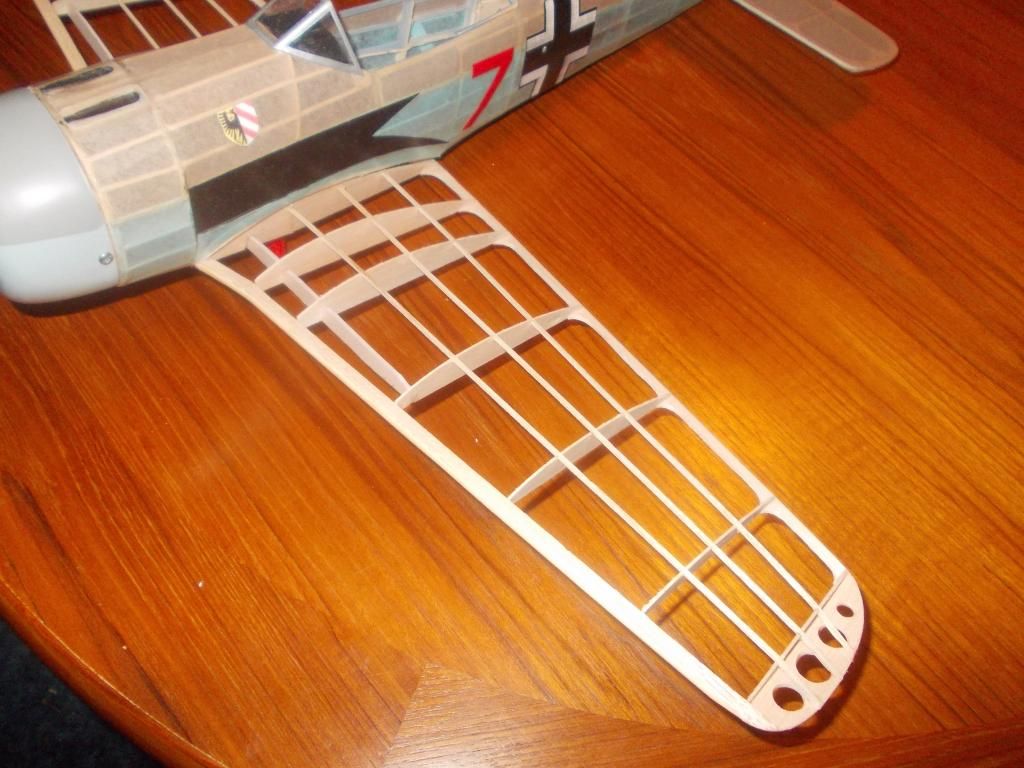
Okay, here's the wing coming together...
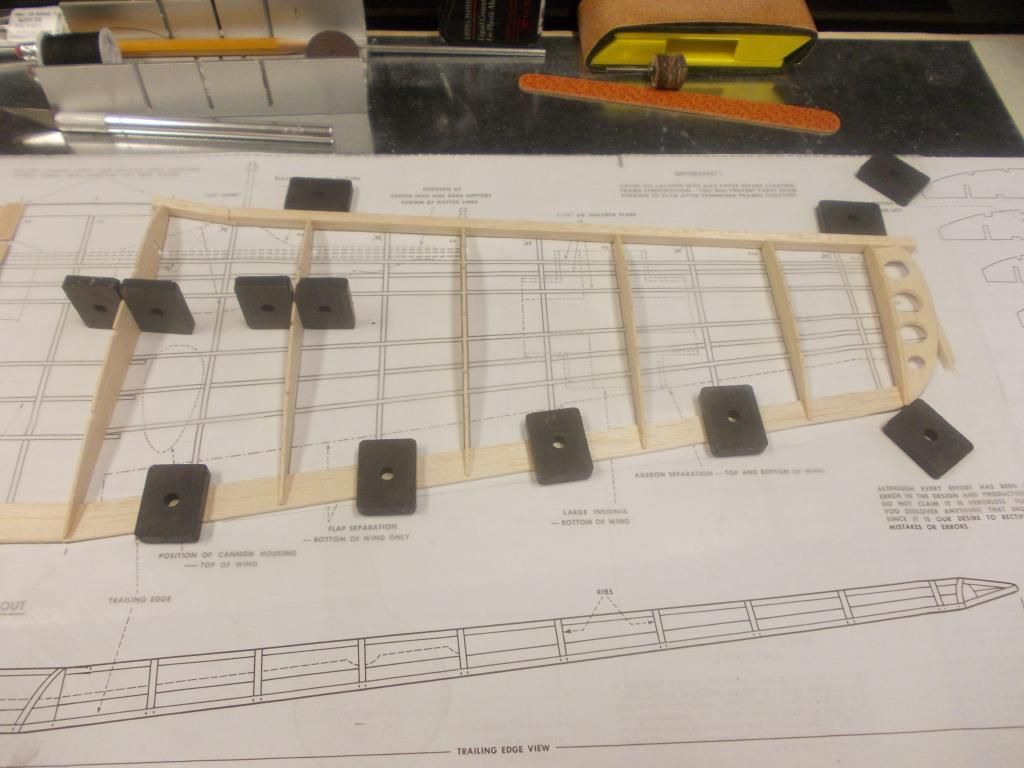
There will be no wing rib (position F3) at the angle change at the LE so I decided to make that a lap joint rather than a butt joint:
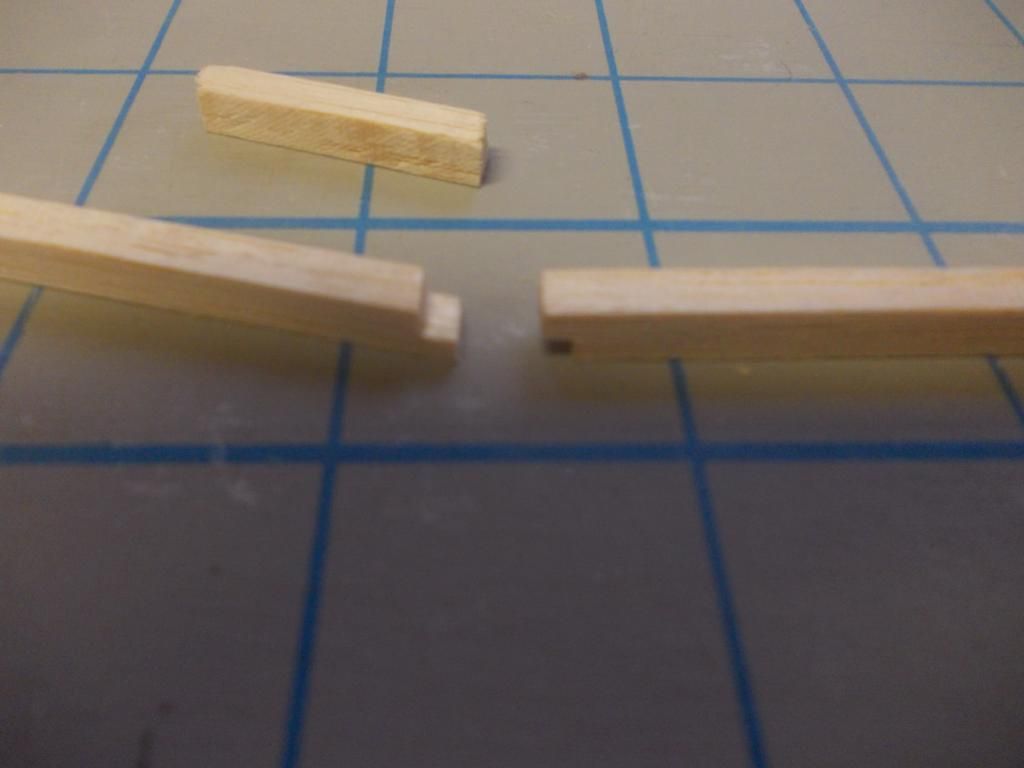
We'll see how that holds up?
When you build these wings, don't forget to raise the wing tip... I put a spacer of 1/8 inch!
This is all a dry fit... Now I will glue, using Elmer's Glue-All.

There will be no wing rib (position F3) at the angle change at the LE so I decided to make that a lap joint rather than a butt joint:

We'll see how that holds up?

When you build these wings, don't forget to raise the wing tip... I put a spacer of 1/8 inch!
This is all a dry fit... Now I will glue, using Elmer's Glue-All.
-
Mitch
- Posts: 1351
- Joined: Mon Aug 22, 2011 9:16 pm
- Location: Kent, WA
Re: The Butcher Bird... the FW 190
TIP of the DAY: (I got this from the guys at FAC)
Since I am trying to make my wing "Super Light", the strength may be compromised...so... for the LE, I will add a thin strip of bamboo!
Get a pack of skewers:
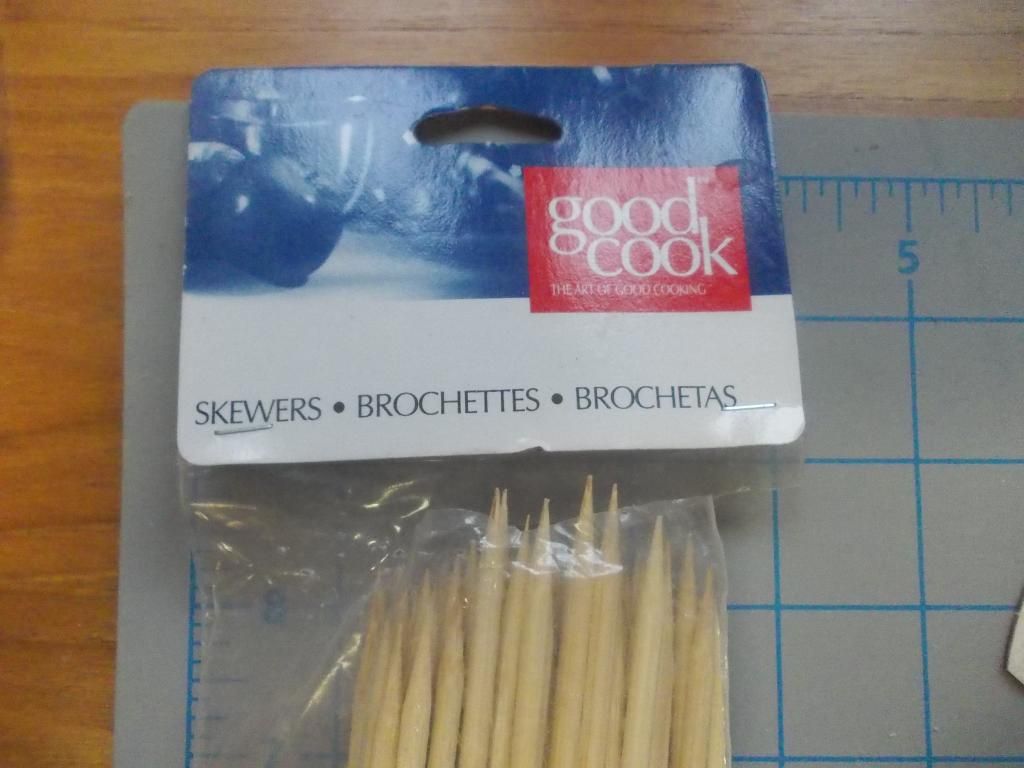
Start a cut and it will split down the grain:
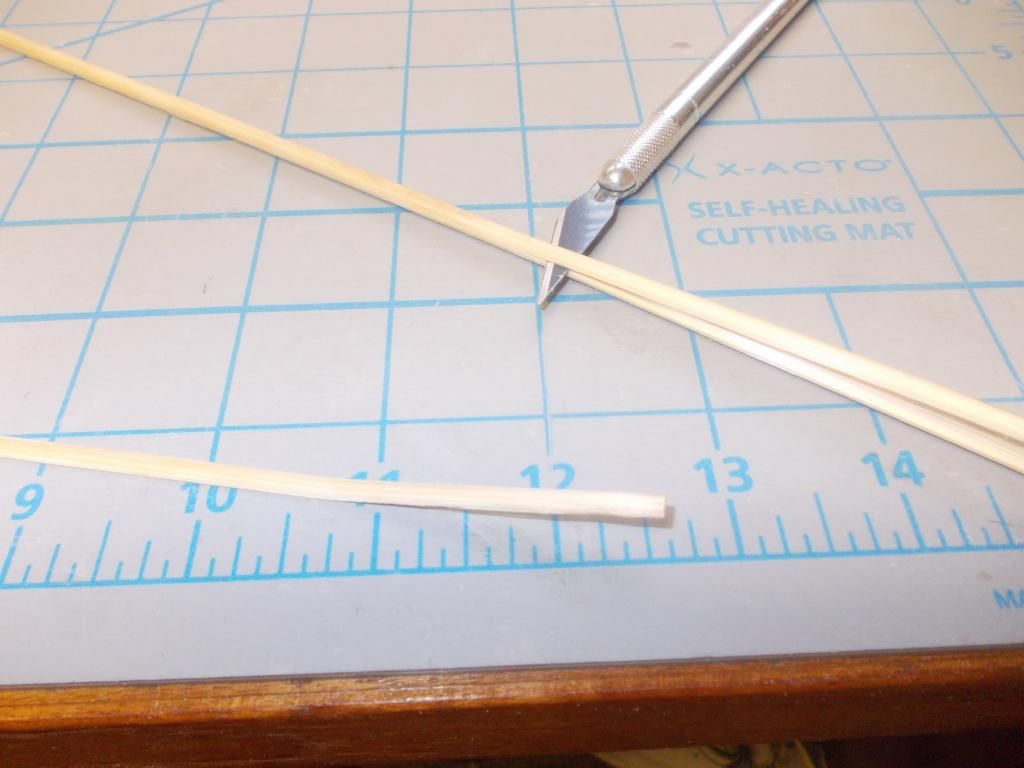
I will add this to the LE:
This may all seem like a lot of extra work, but... this is for a "Competition" model!
Mitch
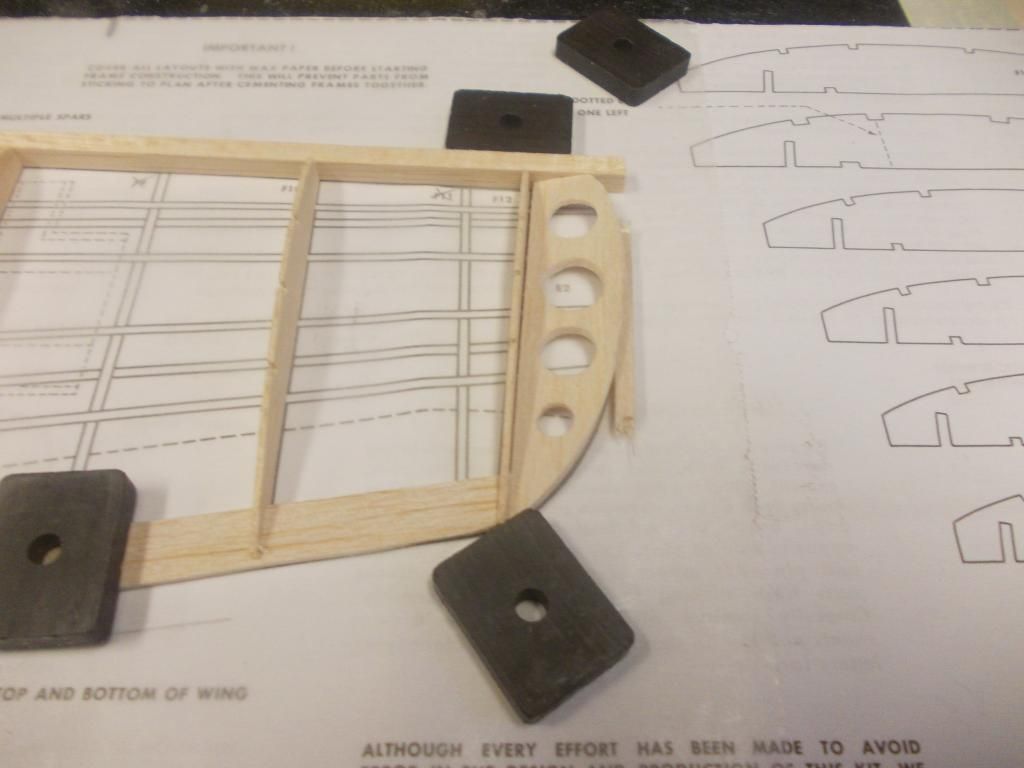
 Note: I also decided to ADD the F3 rib as this is at a structural point in the wing!
UPDATE:
Checking wing "Refit"
Checking dihedral:
I think I can increase a bit more, but I wanted to make sure I am not "Over the Top"
This is still the test plane. After some flights I will build a new model into a FW190-A5 "Slightly Longer Nose"
Since I am trying to make my wing "Super Light", the strength may be compromised...so... for the LE, I will add a thin strip of bamboo!
Get a pack of skewers:

Start a cut and it will split down the grain:

I will add this to the LE:

This may all seem like a lot of extra work, but... this is for a "Competition" model!
Mitch
UPDATE:
Checking wing "Refit"

Checking dihedral:

I think I can increase a bit more, but I wanted to make sure I am not "Over the Top"
This is still the test plane. After some flights I will build a new model into a FW190-A5 "Slightly Longer Nose"
-
Bill Gaylord
- Posts: 904
- Joined: Sun Nov 09, 2008 1:29 pm
- Location: Grove City PA
Re: The Butcher Bird... the FW 190
The bamboo LE is a good method. I got burnt out from sculpting umpteenth wing LEs from medium hard balsa.  After a few Herr builds, I realized how much easier the wings were to build, with formers notched for 1/8" stringers versus sculpting the LEs. I haven't sculpted many LEs in years and now use dowel rod, which is similar to using bamboo for LEs. Like the bamboo laminate, you get a perfect, consistently rounded LE without all the effort of sculpting balsa , and also have a more damage resistant edge. When I cut new formers for the P51 wing, I notched them for the dowel rod, which was a much easier wing build than using the stock sculpted LE method.
-
twospruces
- Posts: 96
- Joined: Tue Nov 20, 2012 9:27 pm
Re: The Butcher Bird... the FW 190
I would be concerned about the mass. Did you measure? What's the penalty over balsa?
-
Bill Gaylord
- Posts: 904
- Joined: Sun Nov 09, 2008 1:29 pm
- Location: Grove City PA
Re: The Butcher Bird... the FW 190
We'll have to wait for Mitch here, but I wouldn't think that the bamboo lamination should add much if any mass, if done efficiently. The reason is that much lighter LE stock can then be used, versus without the lamination. I've tried using contest grade balsa for LE's before, and end up breaking it during the shaping process. For what I do, it ends up breaking during landings also. Similar to Mitch's idea is the dowel rod that I use for LE's. It may seem heavy, but it replaces the entire LE, which again ends up no heavier than using medium balsa for the otherwise beefy plan LE fabrication. I'm gonna try to talk Mitch into trying it out on his next Guillows warbird build.twospruces wrote:I would be concerned about the mass. Did you measure? What's the penalty over balsa?
You do not have the required permissions to view the files attached to this post.
-
Mitch
- Posts: 1351
- Joined: Mon Aug 22, 2011 9:16 pm
- Location: Kent, WA
Re: The Butcher Bird... the FW 190
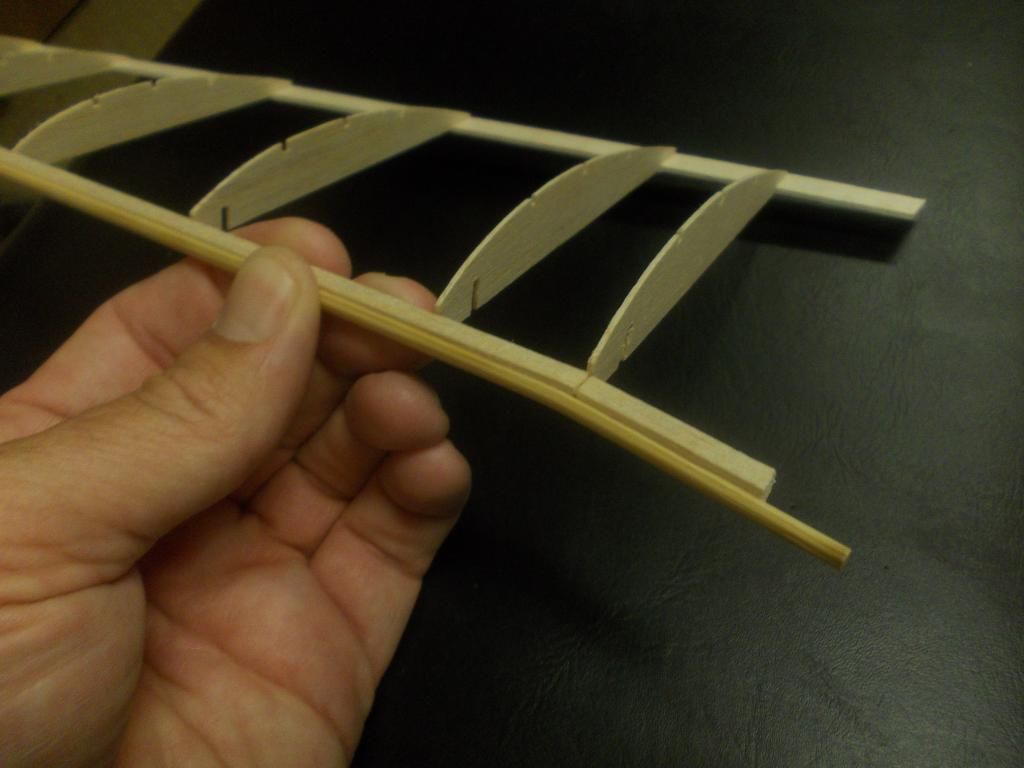
I weighed the 2 pieces of Bamboo I added, together they weighed 1 gram. These can be sliced into half round or just a very thin slice. I used about 1/3 diameter of the bamboo.
Here is the wing getting a dry fit:
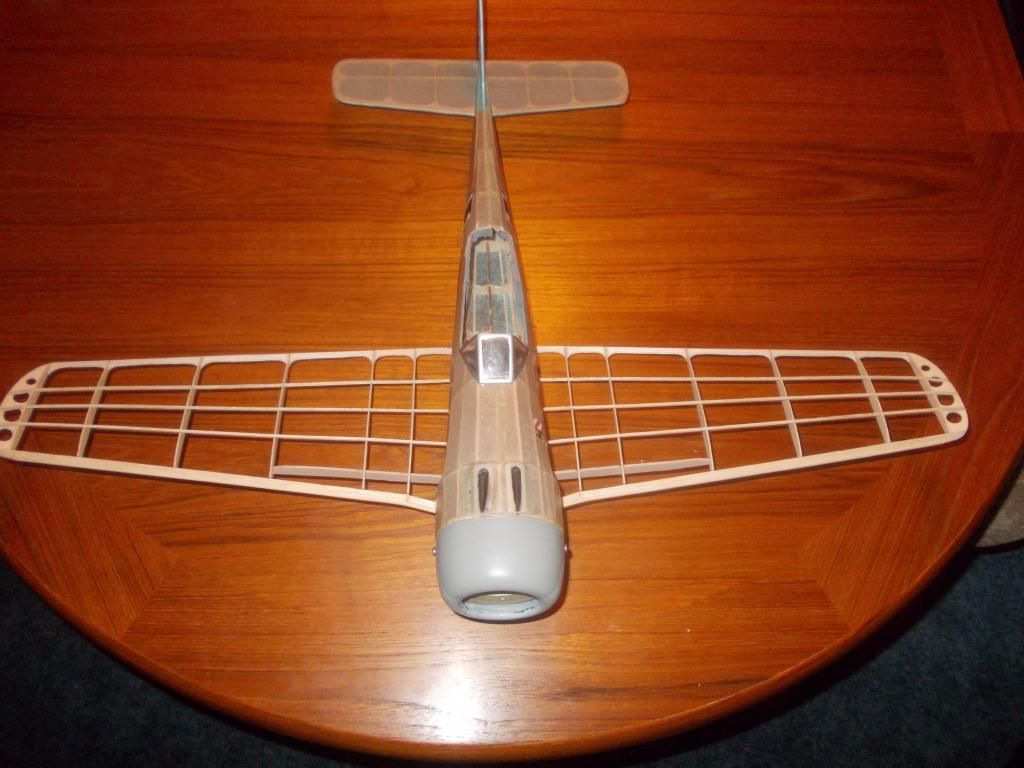
I also removed 1/2 the TE but leaving a nice rounded joint to each rib. So the TE is now 3/16 rather than 3/8.
I dropped the foremost top stringer as I felt the plastic support is there and that eliminated the notch right above the deep notch for the support brace. I also left off the 2 stringers on the bottom... We will only see how this works out!
The OLD wing weighed 28 grams. The NEW wing weighs 14 grams! But of course still needs covering and 2 coats of dope. I expect to add no more than 3 more grams. I was hoping to shave off 10 grams, and think I am on target.
Look close in the second picture and you can see the LE does not come up to meet the top of the ribs... I plan to add just a small piece of 1/32 rib to fill in that transition. I think this will be lighter than adding more LE. In my next wing this could be part of the rib as I cut it out!
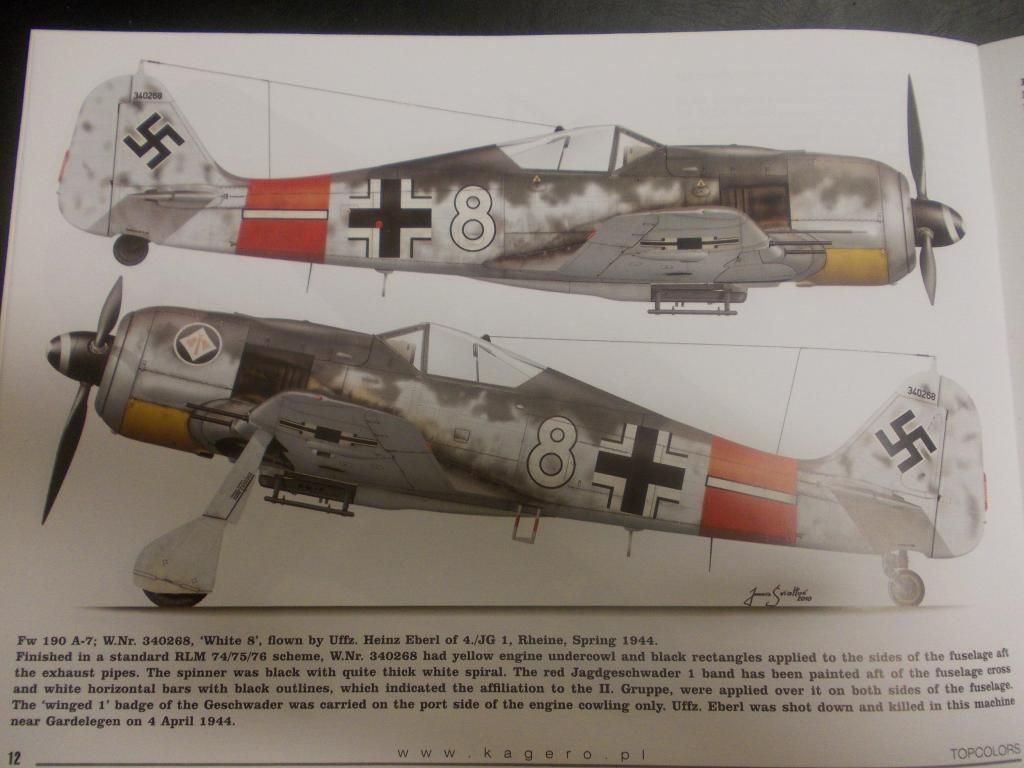
I found my subject, a FW-190 A7:
Mitch
UPDATE: In response to Bill's idea that the dowel LE improved his flight performance... I do not know. The more I learn, the more I realize there are MANY factors that enhance or detract from flight. First, with a Guillows model we can save some weight. That being done, we must build the model straight and then adress proper thrust angle, wing washout and tail incidence that I will try to address as I finish this rebuild and work on my new Focke-Wulf.
UPDATE NOTE: Since this FW was in for repair, I decided to trim back the motor mounts so the cooling fan is back inside the cowling:
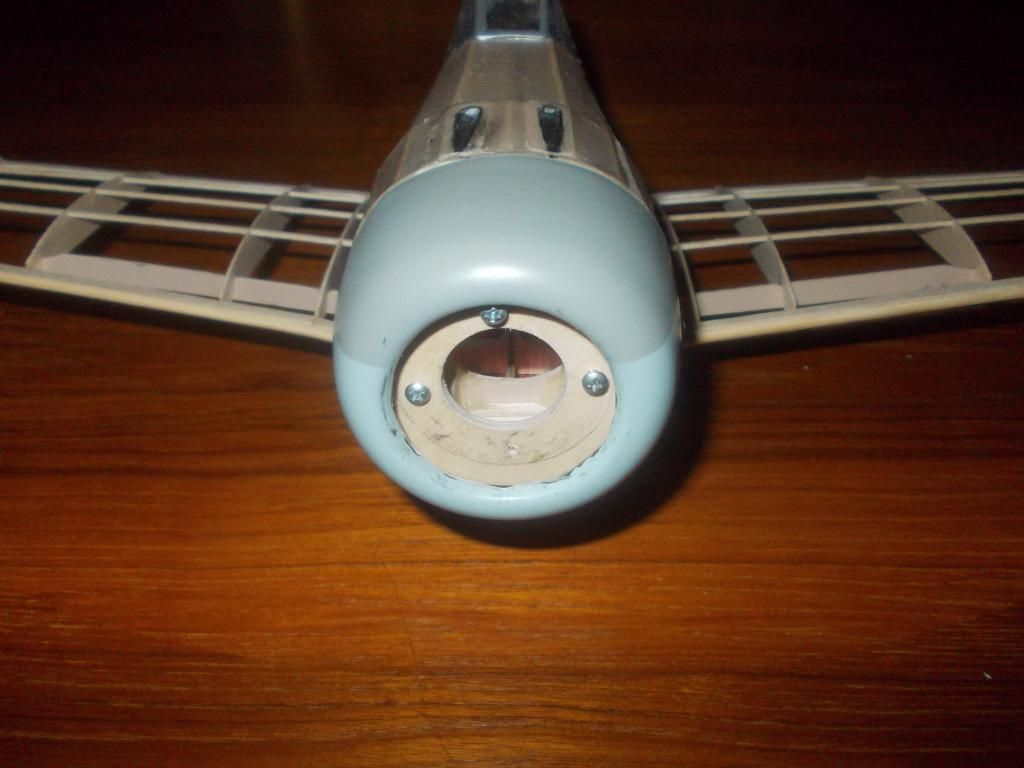
During flight tests I removed the lower adjusting screw as I decided it was not necessary.
Here is the wing getting a dry fit:

I also removed 1/2 the TE but leaving a nice rounded joint to each rib. So the TE is now 3/16 rather than 3/8.

I dropped the foremost top stringer as I felt the plastic support is there and that eliminated the notch right above the deep notch for the support brace. I also left off the 2 stringers on the bottom... We will only see how this works out!
The OLD wing weighed 28 grams. The NEW wing weighs 14 grams! But of course still needs covering and 2 coats of dope. I expect to add no more than 3 more grams. I was hoping to shave off 10 grams, and think I am on target.
Look close in the second picture and you can see the LE does not come up to meet the top of the ribs... I plan to add just a small piece of 1/32 rib to fill in that transition. I think this will be lighter than adding more LE. In my next wing this could be part of the rib as I cut it out!
I found my subject, a FW-190 A7:

Mitch
UPDATE: In response to Bill's idea that the dowel LE improved his flight performance... I do not know. The more I learn, the more I realize there are MANY factors that enhance or detract from flight. First, with a Guillows model we can save some weight. That being done, we must build the model straight and then adress proper thrust angle, wing washout and tail incidence that I will try to address as I finish this rebuild and work on my new Focke-Wulf.
UPDATE NOTE: Since this FW was in for repair, I decided to trim back the motor mounts so the cooling fan is back inside the cowling:

During flight tests I removed the lower adjusting screw as I decided it was not necessary.
-
Mitch
- Posts: 1351
- Joined: Mon Aug 22, 2011 9:16 pm
- Location: Kent, WA
Re: The Butcher Bird... the FW 190
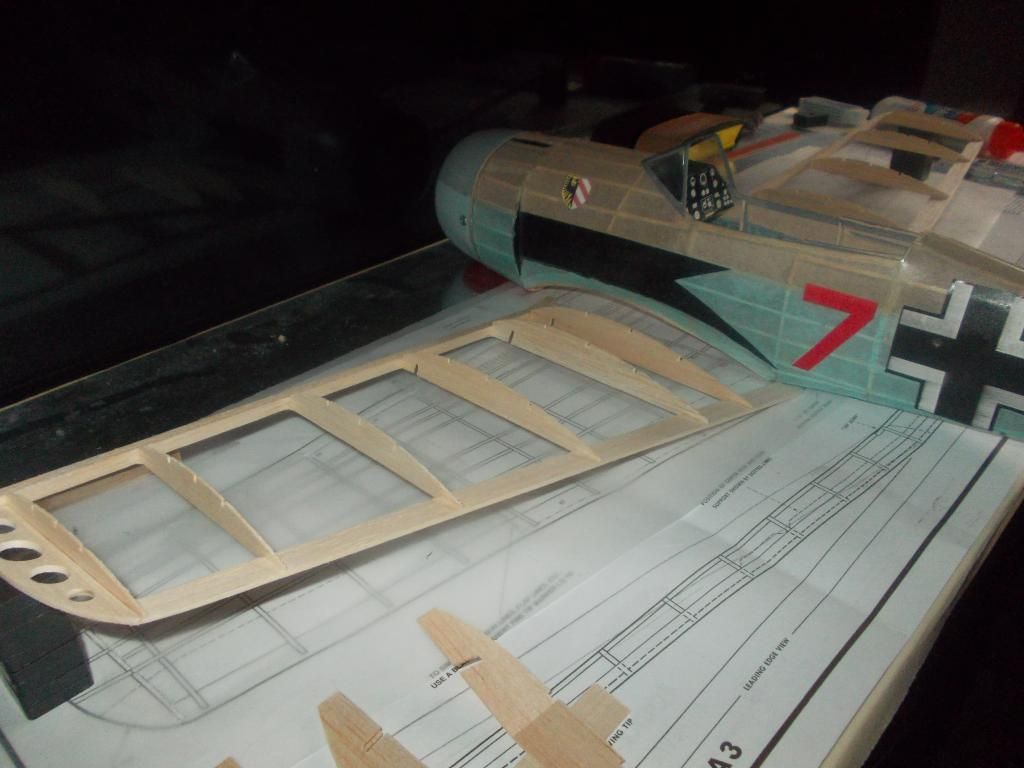
Finally did a little work on the FW... getting the wing covered:
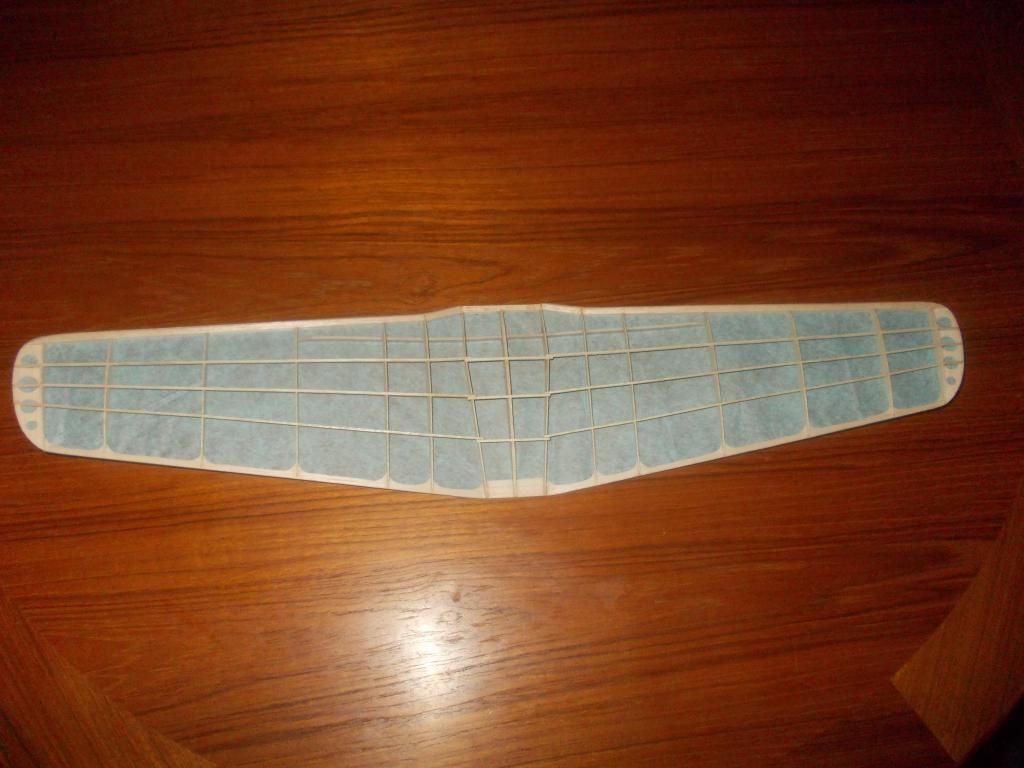
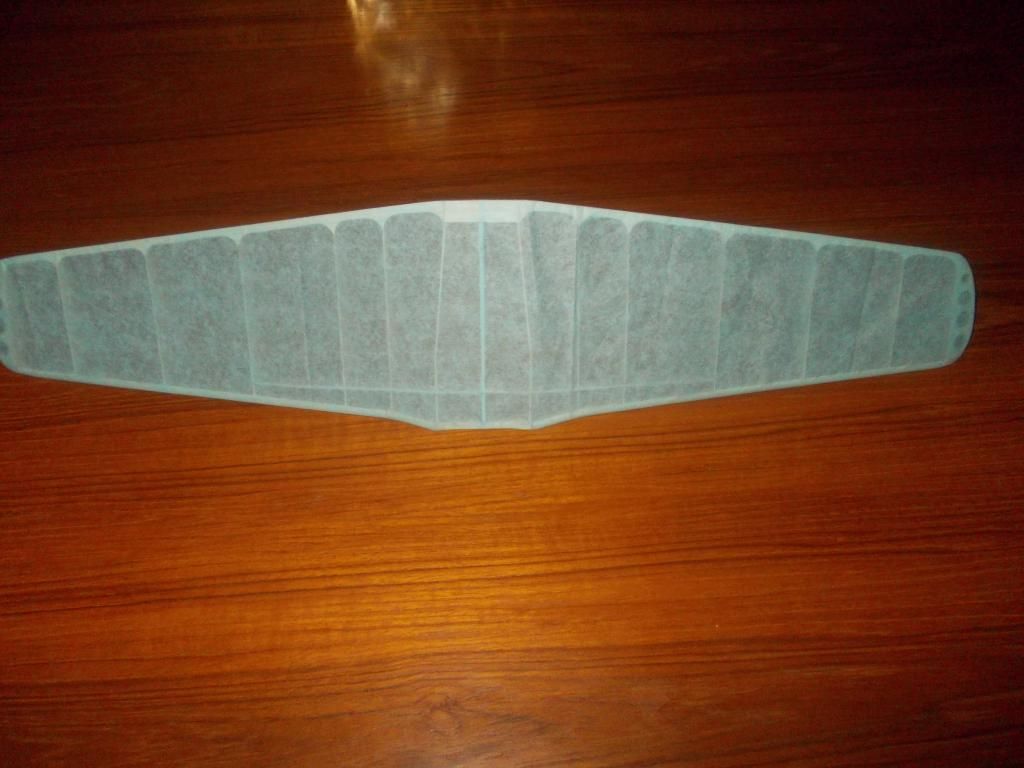
This wing is VERY flexible and I hope it will get finished without warping. I will cover the top today with GREY. Then I will brace and wet paper and hope for the best! Mitch
Mitch


This wing is VERY flexible and I hope it will get finished without warping. I will cover the top today with GREY. Then I will brace and wet paper and hope for the best!
-
jpuke
- Posts: 75
- Joined: Wed May 04, 2011 8:03 am
- Location: Lincoln, NE
Re: The Butcher Bird... the FW 190
Looking good Mitch.