Cessna 180

Ask other modelers for a little help / knowledge ?
Post Reply
thymekiller
Posts: 331
Joined: Fri Sep 12, 2008 7:50 pm
Location: Springfield, MO.

Cessna 180

Post by thymekiller »

I have read alot of posts about the cessna 180 so I thought I'd try one.
I am re-doing part of my hobby room and am inbetween planes. Right now I am testing rubber and prop combos and glues. The weather has turned on me and I just gotta have something on the table. Tonite I punched out the parts. Will post pics as I go. If anybody wants to, feel free to jump in.
Image
Heres the planes I'm testing with. Will post results on that subject later.
Image

thymekiller
"...the road goes on forever, and the party never ends..."
supercruiser
Posts: 405
Joined: Wed Jun 15, 2005 8:47 am

Post by supercruiser »

Looking forward to hear about your tests with the rubber/prop combinations.

Nice hobby room. I like that you have a window. My hobby room is a 4'x4' closet.


I always thought the 180 had good potential as a flier. Thanks for starting a build thread. Can you give some details? Weight of the wood pieces and tissue, size prop, etc I'm curious to how much weight you remove.
FLYBOYZ
Posts: 87
Joined: Sat Feb 14, 2009 11:52 am

Post by FLYBOYZ »

Looking forward to hearing some things about the cessna 180 too!I see that white p40 again thymekiller. I guess your a inspiration to me.Now I have to clean my room up too!eeeks help!May be another time! 8)
thymekiller
Posts: 331
Joined: Fri Sep 12, 2008 7:50 pm
Location: Springfield, MO.

Post by thymekiller »

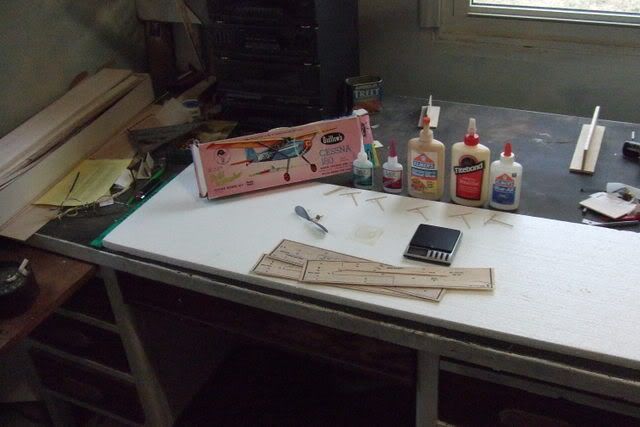
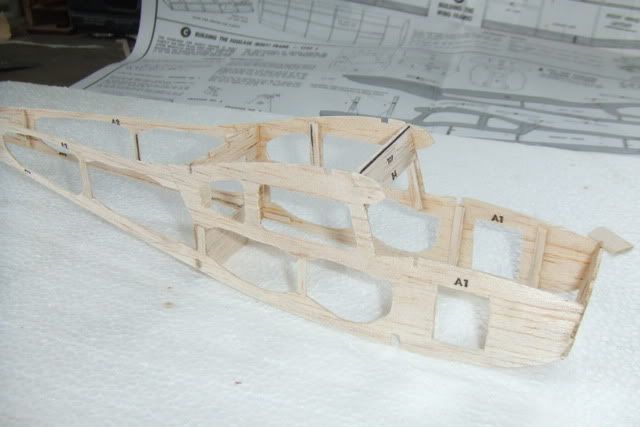
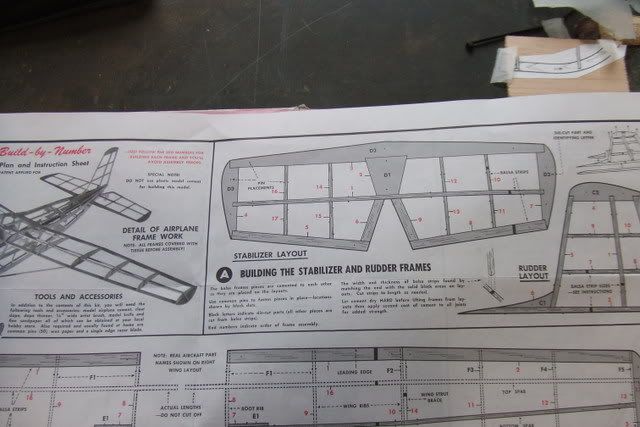
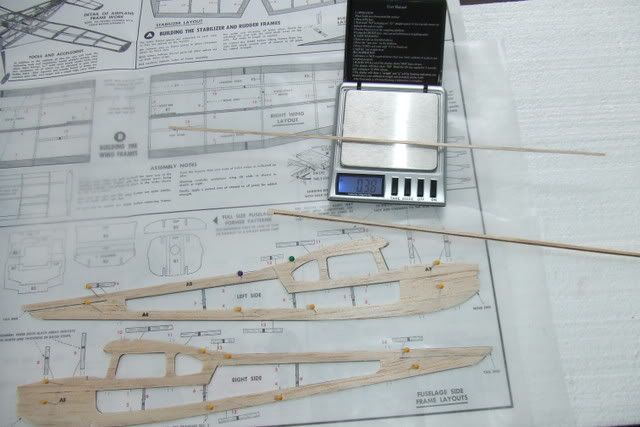
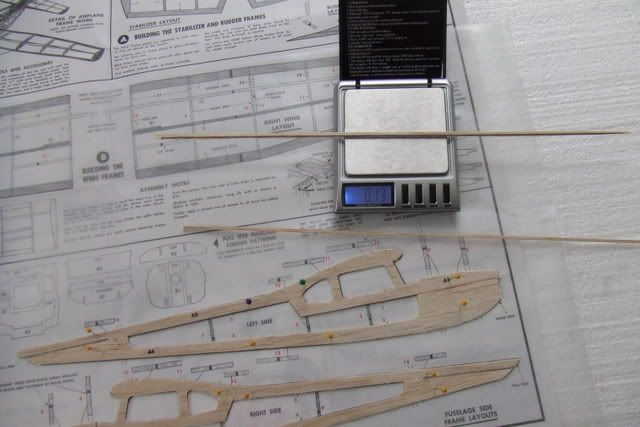
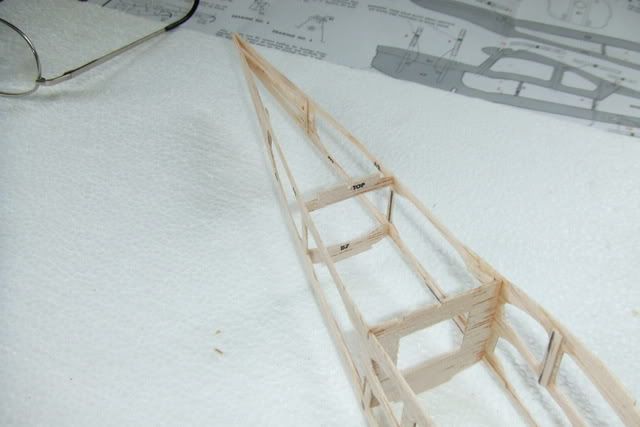
I like this plan. It is my first build by numbers. The red numbers tell which piece to lay first,ect. The plan has lots of tips and seems to be well done, like most guillows plans.
Image

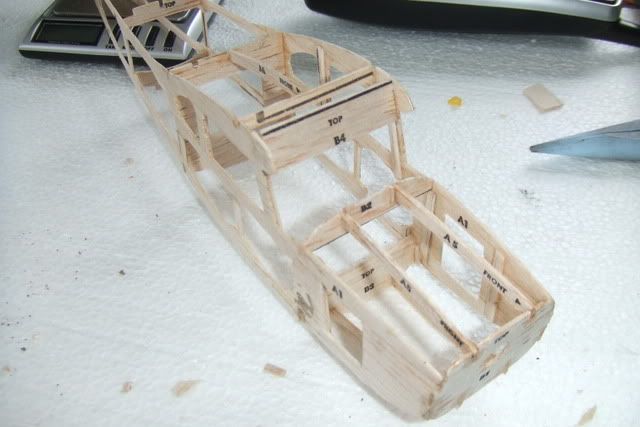
The sheet wood for this kit is excellant. Very lite. The stringer stock, I think, is heavyer than PINE. I will subtitute wood of my own. The plan calls for little scabs inside the fuse to add strengh. The plan called for strip wood. I used left over sheet stock from the die cut parts sheets. Much lighter. Will use the same for stringers where ever I can.
Waste not, want not.
Its not that heavy wood is a bad thing entirely. The heavy stuff is maybe 5 times stronger, and sometimes thats a good thing. If the wood is stronger, you can sand away a great deal of it. Strong wood makes a more robust airplane. You get to fly it more often before that dark moment that we all dread !!!
Image
Image
Image
Image
There is a fine line between strengh and lightness. It is something we all must decide for our selfs. I go to great trouble to cut out weight, but I use a heavy glue. How smart is that ? :oops: Sometimes those facts cancel each other out. :oops: Also, I have built them too weak to survive a crash. First time it hits the ground, its trash. Light weight trash. :lol: But trash nonetheless.

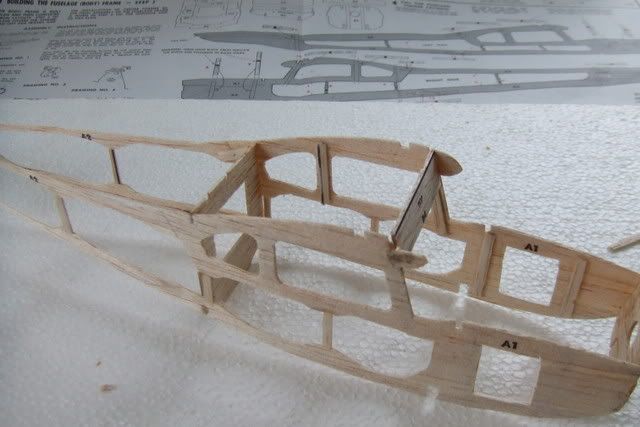
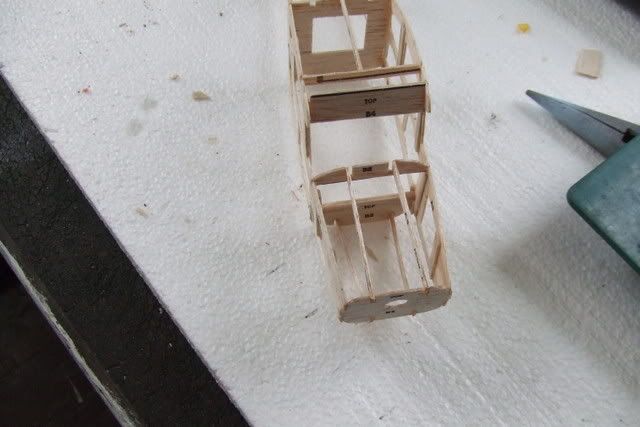
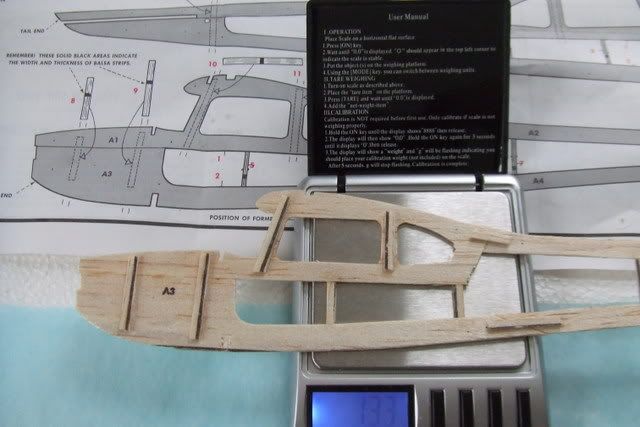
Heres how the rear former is supposed to be.
Image
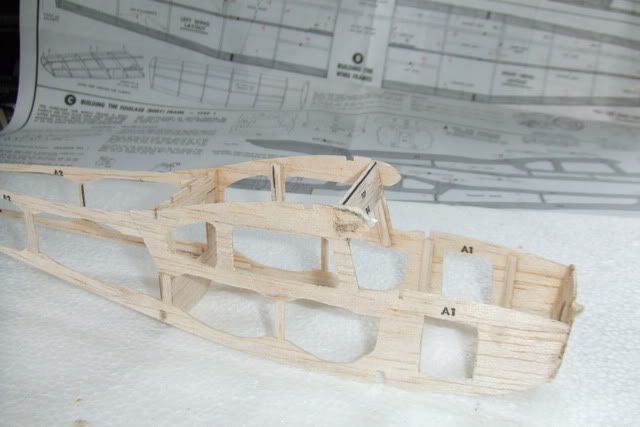
Heres my version. Also, when glueing the tail, I pinched the end too much and could not get a scale shape. I cut the rear former alittle more narrow so as to get a more decent shape, but it still is alittle off from the plans.
Image
Image

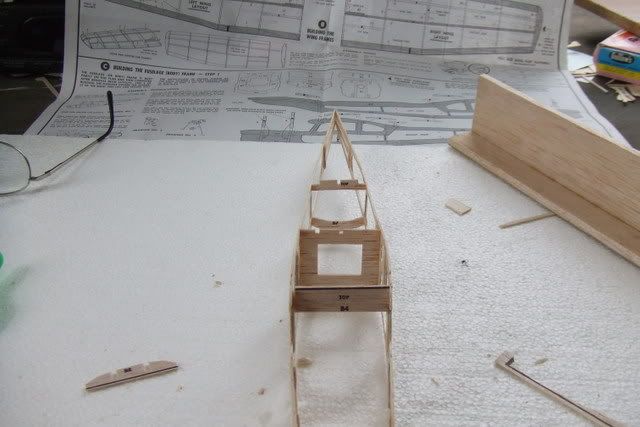
Boo-boo's like that make me realize why some pople build the same plane 2 or 3 times. Also how important it is to read EVERY note and study BOTH sides of the plans before doing any work.
The purpose of this thread is NOT to show the way its done. The purpose is to open discussion on the many different ways it could be done. I am hoping that those who are new will ask, and those who have done it before will answer. There is good and bad about everything and everyway. The ability to make an informed decision and do it YOUR way is where the fun part really kicks in.
I hope this helps.
thymekiller
"...the road goes on forever, and the party never ends..."
RG WILLIAMS
Posts: 41
Joined: Thu Feb 12, 2009 2:44 pm
Location: TEXAS

CESNA 180

Post by RG WILLIAMS »

supercruiser,
Thanks for starting this post. I think it will be a source of good information for use in building our projects. It looks like you have a good work area with a great window for natural lighting.
The F6F looks well well done.
rg
supercruiser
Posts: 405
Joined: Wed Jun 15, 2005 8:47 am

Post by supercruiser »

RG, this is thymekillers little escapade. 8)


Thymekiller,
Am I understanding the picture above that the one little 1/16th stringer weighs .38 grams? 10 of those could end up being significant weight increase.
Actually, there is some truth to what you are saying that the denser wood can be better or useful. On aircraft of WWI vintage, heavy wood such as Ash was used for the landing gear struts.


I know this is jumping ahead.... do the instructions give any feature for tying the wings together?
thymekiller
Posts: 331
Joined: Fri Sep 12, 2008 7:50 pm
Location: Springfield, MO.

Post by thymekiller »

Yes, the lower spar will plug in and glue the main wings solid. Not de-mountable.
Believe it or not, the single slab of stripwood weighed over 8 grams. The fuse is almost finished and its well under 4 grams. I can see a strong spar or leading edge, but thats abit much. Might bring in the whole plane at or close to that weight. The other strip was cut off the edge of the parts sheet.

thymekiller
"...the road goes on forever, and the party never ends..."
FLYBOYZ
Posts: 87
Joined: Sat Feb 14, 2009 11:52 am

Post by FLYBOYZ »

Looking good!It has been fun getting back to the basics with my 170 Its my first cabin curser in the guillow kits had a comet kit it was crutis robbins it was just sheets of balsa wood you put to getter and then paint it.About that fuse its no biggie.I have had that happen to me a few times.Like my dad use to tell me if the rudder and stablizer is lined up with the wings it will fly.I always put my froumers in and make sure they line up before pulling the tail together. Ifound that the thick ca gule works best for me.you can manage it better.The thin stuff is just to fast for me can,t make adjustments then the model turns out heavy because I get it all ovr every thing.Another trick if you using elmers glue you can cut it.I don,t know about wood glues.Most of you probaly know this just thought I throw it in.My biggest problem right now is getting a light weight finish with out killing the plane.Just can,t have a ugly plane.Got a plan its going to involve some clare dope and car paints and alot of thining out. :wink: Keep them coming!
cessna96836
Posts: 13
Joined: Sun Feb 22, 2009 5:33 am

Post by cessna96836 »

sweet yer buildin the 180 to i got wings and tail done and am finishin up the fusesalage. so what color are you going too go with
supercruiser
Posts: 405
Joined: Wed Jun 15, 2005 8:47 am

Post by supercruiser »

Something that I like to do is cut my wing spars and trailing edges longer than what is shown on the plans. So that when the wing is inserted into the fuselage the spars almost touch. Then I take a piece of balsa and join the ends of the spar. Then the fuselage is better able to withstand nose first landings which would cause the wings to pull apart the formers. There is an example of this on www.virtualaerodrome.com , my hangar with the P-51.
Arlo DiPasquale
Posts: 207
Joined: Tue Jun 10, 2008 9:22 am
Location: Minneapolis, MN

Post by Arlo DiPasquale »

A Cessna 180 is up next on my assembly line after i finish my B-24.
H65 Driver
Posts: 52
Joined: Tue Feb 10, 2009 3:52 pm

Post by H65 Driver »

Arlo,

How's the B-24 going? Any pictures for here or virtualaerodrome?
H65 Driver
Posts: 52
Joined: Tue Feb 10, 2009 3:52 pm

Post by H65 Driver »

BTW, sorry about going off-topic. I'll try to keep that to a minimum.
thymekiller
Posts: 331
Joined: Fri Sep 12, 2008 7:50 pm
Location: Springfield, MO.

Post by thymekiller »

Its all good. I too, would like to see pics of the b-24. I guess theres alot of wood on that jewel.
I did mention that I'm a slow builder, right? :lol:
"...the road goes on forever, and the party never ends..."
thymekiller
Posts: 331
Joined: Fri Sep 12, 2008 7:50 pm
Location: Springfield, MO.

Post by thymekiller »

Got a little more done. Broke the front of the main wing mount. Seems like there is always something to break. :lol: I cut out the bad and fitted a piece of scrap. Then marked the final shape and cut around that. Sanded to final.

Image
Image
Image

On the nose the slots at the dash board were too big so I filled in with scrap.

Image
Image

Few more stringers and ready to cover the fuse.
"...the road goes on forever, and the party never ends..."
Post Reply