I would like to install my motor before the fuselage is covered. I know this against tradition and could see the reason for it when we were using dope and other things that are hard on rubber. Now with 50/50 elmers that does not pose quite the same threat to the rubber. If there is a good reason that still exists to install after covering I would like to hear it.
I have another problem that fly's in the face of tradition. I am working on Fairchild and where the wing attaches to the fuselage there are support stringers that enter the cockpit area for stability that must be glued after covering. Compounding that problem is that the wing must be pressured in two places to conform to the fuselage. The only solution I see is to attach the wings before covering.
Any and all help appreciated...............Thanks
Installing rubber motor
-
granpa
- Posts: 72
- Joined: Wed Feb 09, 2011 5:45 pm
- Location: Ellsworth WI
Installing rubber motor
granpa
-
Supercubber95
- Posts: 218
- Joined: Wed Apr 21, 2010 2:13 pm
- Location: Belle Fourche, South Dakota
-
ADW 123
- Posts: 1158
- Joined: Mon Feb 22, 2010 5:22 pm
- Location: Cincinnati, Ohio
first of all, like phugoid, i use a little wire with a hook on the end capable of pushing the rubber back to the rear peg. you should always inspect/wash rubber after all flying is done for the day. i use castor oil as lube, so i have to take it out and wash it so it doesnt dry up. then it is let out to dry and then it is put in a zip lock. regardless, you should find some kind of method that works for you, (like the one i just mentioned, an acess panel works, and a combination of the two works very well.)
as for the fairchild, you should continue looking at the plans to find out how it works. i mean, you should be able to cover BEFORE you put it together. usually on a guillows kit, it shows a pic of the frames glued together. see if you can find that. it usually says somehting like, "all frames should be tissued before assembled." or something like that.
as for the fairchild, you should continue looking at the plans to find out how it works. i mean, you should be able to cover BEFORE you put it together. usually on a guillows kit, it shows a pic of the frames glued together. see if you can find that. it usually says somehting like, "all frames should be tissued before assembled." or something like that.
-
BillParker
- Posts: 1031
- Joined: Sat Jan 19, 2008 1:21 pm
- Location: Houston, Texas
- Contact:
I always itall the rubber before covering, as it's such a pain to do afterwards...

William H. Parker Jr. (Bill Parker)
President, Parker Information Resources
http://www.parkerinfo.com/ap.htm bparker@parkerinfo.com
President, Parker Information Resources
http://www.parkerinfo.com/ap.htm bparker@parkerinfo.com
-
supercruiser
- Posts: 405
- Joined: Wed Jun 15, 2005 8:47 am
I have built the Guillow Fairchild. The fuselage and wings are covered before attaching the wings. The cross brace, shown in section D of the plans, No. 9
is glued in place and then Section F shows covering. The wings are slid in place with some glue on the support stringers (spars). I like to have some kind of clamp on these cross braces. The top of the cabin can be left uncovered until after the wings are installed. The top of the cabin is a separate piece of tissue, No. 11 in Section F.
Did this make any sense??
By the way, the motor peg is in the extreme end of the fuselage. I find it kind of cramped back there when I have to change a rubber motor.
you might consider relocating the motor peg to just behind B15.
-
Phugoid
- Posts: 952
- Joined: Wed Jan 20, 2010 8:17 am
I don't fit the rubber in until I fly, If you make up a liitle tool to push it to the rear peg, at the end of the day you've got to change the rubber at some point. For instance there is no guarantee that the rubber you fit initially will be right, and if you fit it from the off how do you lube and inspect it?
This tool is made with a bit of aluminium tube with the end flatened, and a slight fork in the end, the peg is simply pushed through the gap and the tool withdrawn.
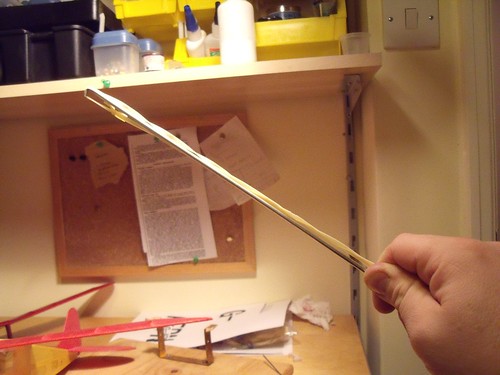
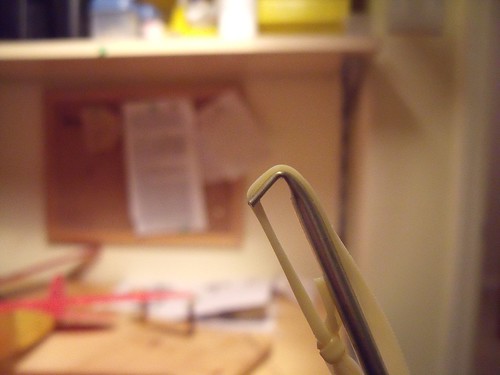
This tool is made with a bit of aluminium tube with the end flatened, and a slight fork in the end, the peg is simply pushed through the gap and the tool withdrawn.
-
kittyfritters
- Posts: 767
- Joined: Tue Jan 03, 2006 6:58 pm
- Location: California
Here is another variation on the pusher stick that I use. The fork on the end of the stick has a groove around the outside so that a loop of rubber can be installed and a groove on the inside with a relief on one side so I can install a motor with drapery rings bound into the ends.


It's very easy to get the motor peg through either type of motor with this stick. Of course, all the formers and the nose block hole have to be large enough for the head of the stick to pass through.
The stick itself is an I-beam made of 3 pieces of 1/8" X 3/16" hard balsa about 18 inches long. This is long enough for any of the models I have made recently.