I need help, yes, again...
-
Szyp
- Posts: 197
- Joined: Fri May 27, 2011 4:10 pm
I need help, yes, again...
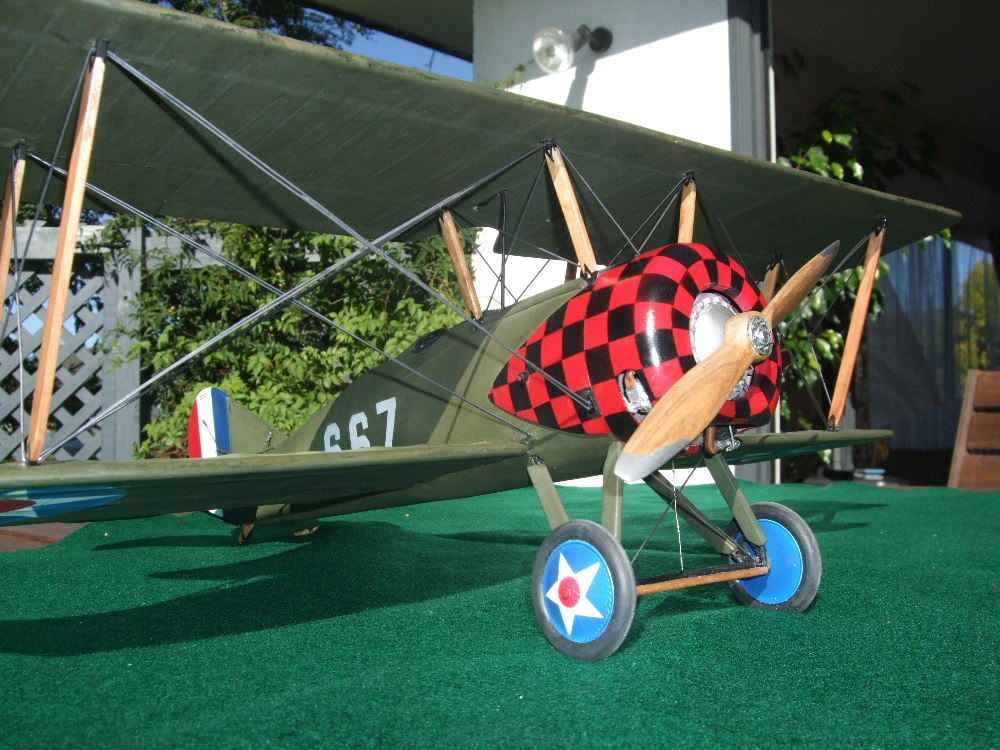
I saw them once, but cannot locate the site that sells checkered decals and US military aircraft marking decals. I would like to "dress up" the cowl on my Morse Scout and cannot relocate the site. Does anyone have any idea where I can look? 
-
grinx76
- Posts: 23
- Joined: Thu Dec 23, 2010 7:54 am
-
roring40
- Posts: 17
- Joined: Wed Jan 14, 2009 3:57 am
- Location: Nelson, New Zealand
Thanks for the feedback. Alas nothing is perfect and like all modellers, I've found plenty of things I'd change if I built it again. For the full build details have a look in virtual aerodome - my hanger is Roring40. The bracing is very thin piano wire and the fastners are in fact just painted on the wing struts (black paint in the shape of fastners) with small holes drilled to receive the bent over tips of the wires. On the fuselage, small plastic fastner plates were attached with holes drilled in. Wire was bent slightly at both ends and then plugged in. In terms of robustness it's okay but no better. ANy flexing of the model and the wire comes adrift but hey it's hanging from the ceiling and shouldn't be flexing. It's a great plane to build and I look forward to seeing yours develop.
-
Szyp
- Posts: 197
- Joined: Fri May 27, 2011 4:10 pm
I admire your resourcefulness. The only "innovation" I have used so far- I am still in the pre-covering build stage- is to use popsicle sticks- White birch- cut to shape for the varnished wood effect on the struts and wherever else it is appropriate, stained with the zar color aged varnish. It looks pretty good. 
-
roring40
- Posts: 17
- Joined: Wed Jan 14, 2009 3:57 am
- Location: Nelson, New Zealand
The fun is certainly in the making and finding new materials and techniques to build these kids is a real delight. Your struts sound like a great idea and I look forward to seeing some pics as the plane develops. The hardest thing I encountered was changing the lower wing from the plan arrangement where it was built into the fuselage, to a more accurate
sparred sort of setup. If you have any Q's drop me a line, I'm always happy to help. Cheers, Nigel
sparred sort of setup. If you have any Q's drop me a line, I'm always happy to help. Cheers, Nigel
-
Szyp
- Posts: 197
- Joined: Fri May 27, 2011 4:10 pm
Question: It appears that your model is a static fly because I see the radial engine cylinders. If I am correct, what color did you paint it, and any details? I have painted my metallic gray, and it looks similar to yours, but it doesn't hurt to ask. My propeller if a wooden one, 8inches long and made of wood that I purchased from Tower Hobbies. I copied the scale plan propeller drawing, UHU'ed it to the propeller, and sanded it to match. All I need to do now is stain it to match a real one. Thank you for your continued courtesy and kindness.
-
cliffm
- Posts: 370
- Joined: Fri Feb 27, 2009 11:08 am
- Location: fairdale N D