Cessna 180 Group Build
-
Phugoid
- Posts: 952
- Joined: Wed Jan 20, 2010 8:17 am
Cessna 180 Group Build
sdfgdsfgsdgb
Last edited by Phugoid on Sat Apr 05, 2014 2:08 am, edited 1 time in total.
-
Phugoid
- Posts: 952
- Joined: Wed Jan 20, 2010 8:17 am
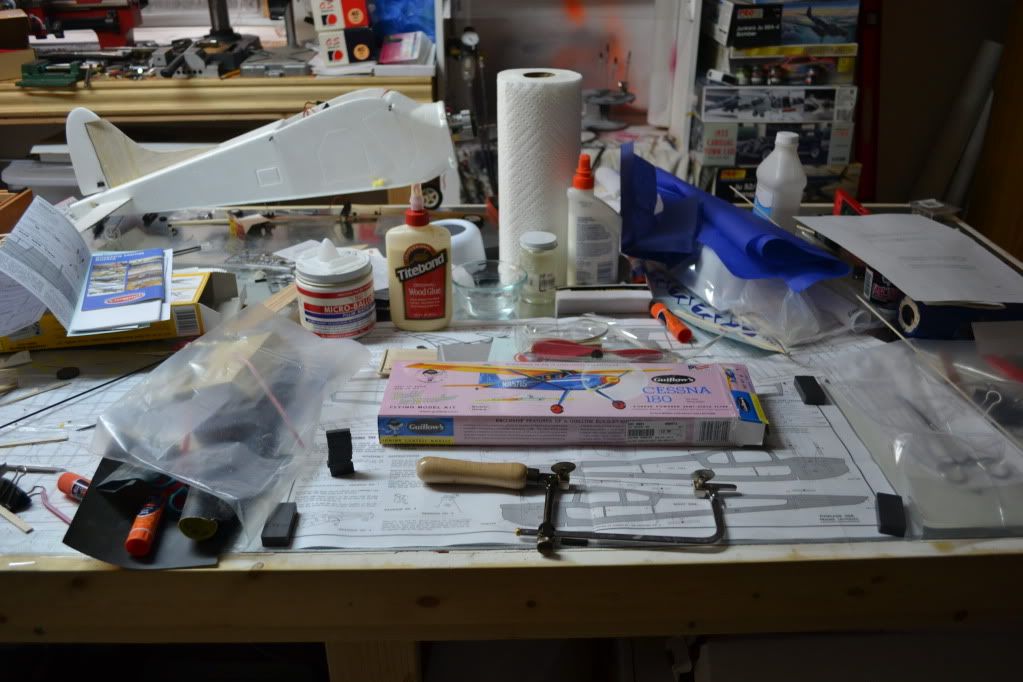
Tools and Things We'll need
[ flat.
Last edited by Phugoid on Sat Apr 05, 2014 2:08 am, edited 1 time in total.
-
MakMov
- Posts: 137
- Joined: Wed Sep 21, 2011 10:18 am
Me I am going a little different route and build on a magnetic bench.
Otherwise, I use the same tools pretty much.
Exacto #11
Single sided razor blades
couple different metal rulers.
Sqaures
Pair of good titanium scissors
Brushes
And I like the foam sanding blocks.

Other things I like to use is
White glue, glue sticks, Title bond II, Sig Nitrate Dope, alcohol, jewler saw, razor saw, donno if I will need for this but also a fusealage jig.
Otherwise, I use the same tools pretty much.
Exacto #11
Single sided razor blades
couple different metal rulers.
Sqaures
Pair of good titanium scissors
Brushes
And I like the foam sanding blocks.

Other things I like to use is
White glue, glue sticks, Title bond II, Sig Nitrate Dope, alcohol, jewler saw, razor saw, donno if I will need for this but also a fusealage jig.
-
StefanJ
- Posts: 108
- Joined: Mon Feb 28, 2011 9:46 am
I have a "lesson learned" trick I'd like to pass on.
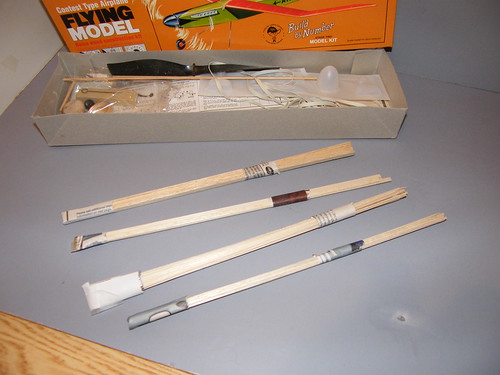
After using the wrong-sized strips in various parts of my Cessna, and also running out of certain piece, I started my (currently stalled) Arrow build by carefully sizing and sorting out the strips into neat bundles:

The bundles have end caps and wraps made of paper and scotch tape. Having the right piece at the right time will reduce a lot of confusion and misery.
(I finally glued the wings on my Cessna 180 this afternoon and will post a picture later in the thread.)
After using the wrong-sized strips in various parts of my Cessna, and also running out of certain piece, I started my (currently stalled) Arrow build by carefully sizing and sorting out the strips into neat bundles:

The bundles have end caps and wraps made of paper and scotch tape. Having the right piece at the right time will reduce a lot of confusion and misery.
(I finally glued the wings on my Cessna 180 this afternoon and will post a picture later in the thread.)
-
Phugoid
- Posts: 952
- Joined: Wed Jan 20, 2010 8:17 am
-
Phugoid
- Posts: 952
- Joined: Wed Jan 20, 2010 8:17 am
-
StefanJ
- Posts: 108
- Joined: Mon Feb 28, 2011 9:46 am
I like the idea of bagging the pieces by section and tacking them to a bulletin board.
I've (ahem) "salvaged" several large bulletin boards that folks moving out of their apartments left behind. (One had a few dollars in postage stamps as a bonus.)
Since I only plan on working on one model at a time, I can use the other for organizing the parts!
I've (ahem) "salvaged" several large bulletin boards that folks moving out of their apartments left behind. (One had a few dollars in postage stamps as a bonus.)
Since I only plan on working on one model at a time, I can use the other for organizing the parts!
-
Squishyp38
- Posts: 240
- Joined: Sun Feb 27, 2011 8:08 pm
- Location: Top Secret
-
MakMov
- Posts: 137
- Joined: Wed Sep 21, 2011 10:18 am
That thing....
It's an old Grand Wing Servo (GWS) Beaver, an RC Foamy, that I am trying to finally get going. One of the few kits my wife ever bought me.
My cat decided to eat the vertical stab and the prop off it, but it's closer now to flying than it's ever been. I still have quite a bit of work to do on it, though.
